
Over the past three weeks myself and a colleague have been busy (both at work and a lot of overtime at home) building a new light-weight CMS built on top of the Laravel framework, this will power a new recruitment campaign website, of which is to be hosted on the Windows Azure cloud platform (our corporate hosting strategy means moving as many sites and application to Microsoft Azure Cloud hosting as possible)
So anyway, today I had a play around with the Azure hosting platform but with the very small amount of information available on the web, it took me at-least three hours trial and error trying to get my head around how to get Laravel working on what is essentially a Windows environment of which is not something I normally deploy PHP applications/webstes to.
I worked on getting our new application automatically deployed (from BitBucket) to Windows Azure Websites (PaaS) so I thought that now would be a good time to document it, in the hope that it may help others in future.
In this guide, I’ve cloned the vanilla Laravel repository here to a private BitBucket repository just to demonstrate how the automatic deployment via. BitBucket work.
Configuring the web application instance
First thing is first, login to the Azure management portal by visiting: https://manage.windowsazure.com/
Once logged in, on the left side of your browser you will see a set of icons, click on the ‘Web apps’ icon to display the list of current web applications/sites you have configured, then click on the ‘New +’ link, a new modal window will open and enter your application details like so:

Once you click on the ‘CREATE WEB APP’ button at the bottom of the window, your application instance will be created and then you’ll be taken back to the ‘WEB APPS’ dashboard where your newly created application will be listed.
The next thing we’ll do is, configure the application instance to use the latest version of PHP (5.6) at the time of writing, so click on the application name to bring up the application information section and then from the top links, click ‘CONFIGURE’.
The following screen will then be displayed, click on PHP 5.6 as shown below:

Continue scrolling down this page and now add the following environment variables:
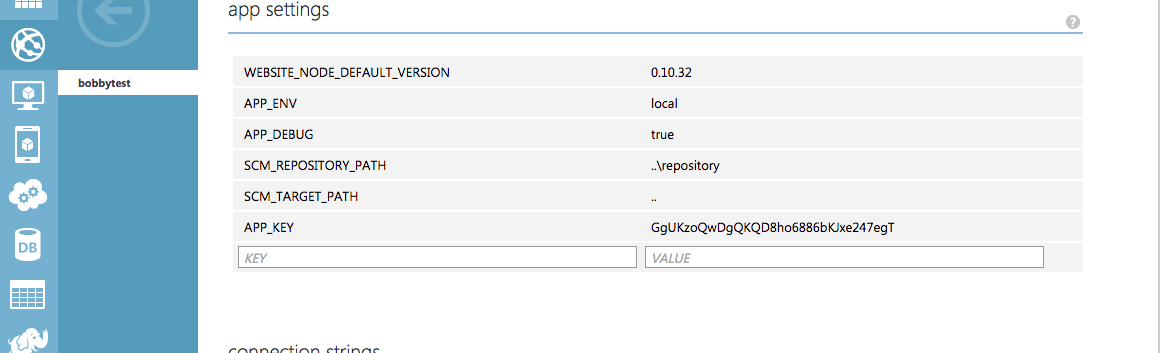
By default the ‘WEBSITE_NODE_DEFAULT_VERSION’ will already be set, simply ignore this. You’ll need to (at a minimum) add the following with the values shown above in the screenshot:
- SCM_REPOSITORY_PATH
- SCM_TARGET_PATH
You’ll find that if you fail to set the APP_KEY value to a valid 32 character encryption key (you can use php artisan key:generate command to create one if you wish!) otherwise you’ll encounter a Laravel Encryption exception as demonstrated here.
In my example above, I’ve also added APP_ENV and APP_DEBUG for testing purposes but ideally these should obviously be set appropriately in a production environment, you’ll also have a load more environmental variables that you’ll want to add here (basically the ones that you would normally place in your .env file!)
Now, we’re going to update the default applicaiton root directory; by default your application will serve the root directory from ‘site\wwwroot’, we need to change this to ‘site\public’ as per this screenshot:

After adding or modifying the environmental variables and set the virtual application directory path ensure you SAVE your changes and it’s a good idea for you to ‘RESTART’ the application to ensure that these environmental variables are passed through and accessible to your Laravel application.
Adding IIS rewrite support
Out of the box Laravel provides an Apache .htaccess file that routes all requests to the public/index.php file of which is the entry point to our application and passes all requests to the routing layer of which then dispatches the required controller requests/responses etc.
In order for Laravel to work correctly we need to now create a new file in our D:\sites\public directory (in your project you’ll want to commit this file to source control to save you having to do it manually in future), the file should be named ‘web.config’, in this file you should copy and paste the content of this GitHub Gist.
Restart your web application for the changes to take effect, you’ll now find that your application request routing works the same as it does with Apache or your Homestead development VM.
Enabling Composer support
You should already know by now that you can access your site on a sub-domain of azurewebsites.net, in this example, I can access my test site at: http://bobbytest.azurewebsites.net
In order for us to enable Composer support for our application, we need to access the Kudu management panel; to do this we simply add ‘scm‘ between our application name and the ‘azurewebsites.net’ part, so in this example, it would be: http://bobbytest.scm.azurewebsites.net/
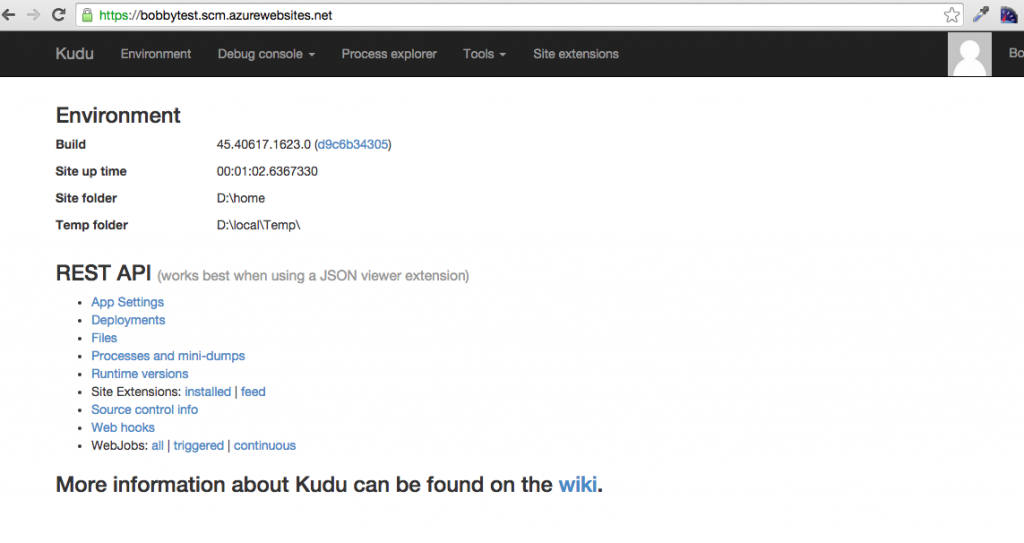
When the Kudu management panel loads, you should click on ‘Site extensions’ from the top navigation bar…
Next, click on the ‘Gallery’ tab (as at present you won’t have any installed extensions in the ‘Installed’ tab), scroll down and find ‘Composer’ and then click on blue ‘+’ button to install it.

Great, now we can move on to configuring the automatic deployment of our application using Git.
We’ll come back to Kudu later as this provides us with CLI access to our hosting instance and enables us to run Composer and Artisan commands.
Configuring automatic deployment from BitBucket
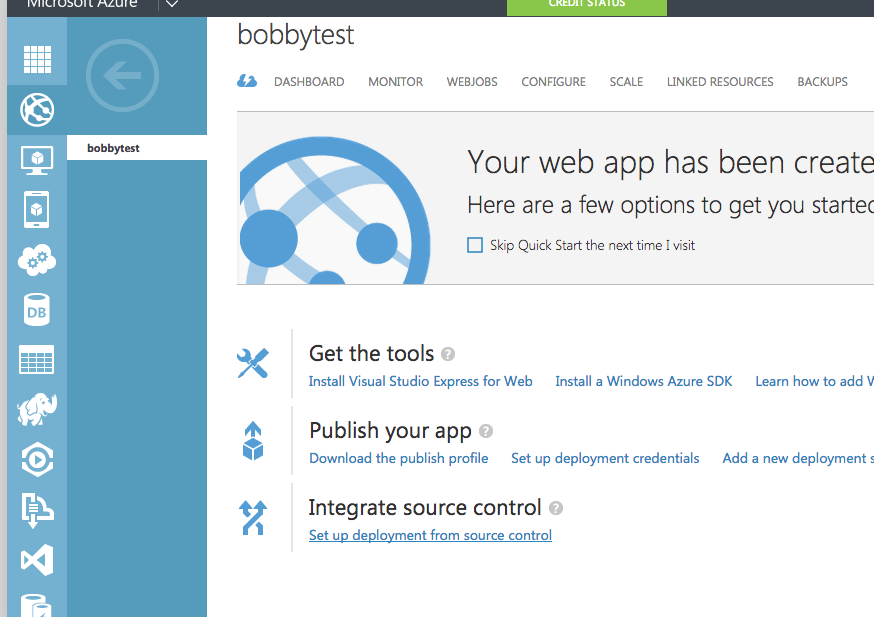
From our web application dashboard, click the ‘Setup deployment from source control’ of which is situated under the ‘Integrate source control’ section as shown below.
A modal window will then appear this will allow you to choose your SCM hosting provider…
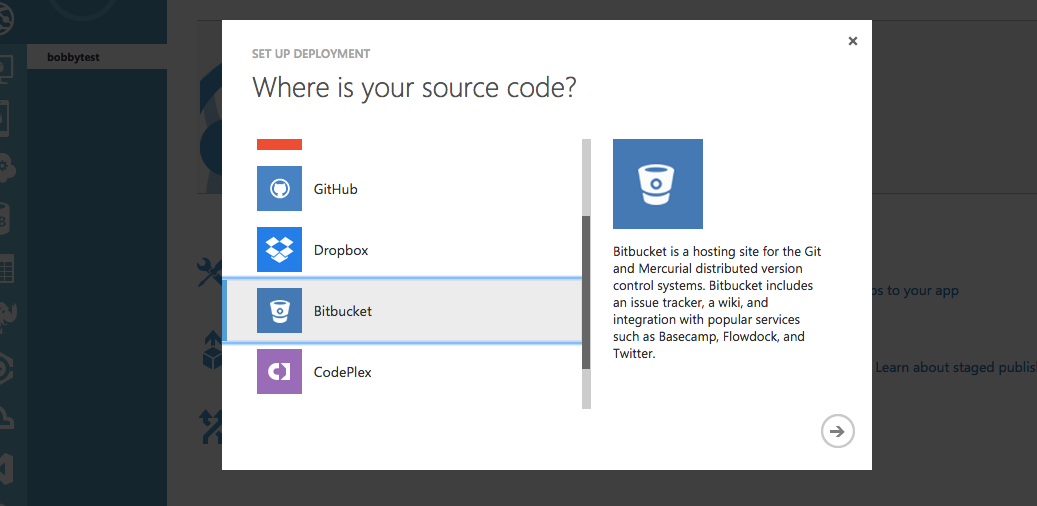
Click on ‘BitBucket’ and the click the next button.
Next you will have to authorise your BitBucket account and then choose your repository that you wish you deploy from, you’ll also have the option to choose the deployment branch.
For this test I’ve simply used ‘master’ but I would highly recommend using a dedicated deployment branch, in our configuration I plan to have both a ‘deploy-production’ and ‘deploy-uat’ branches of which can then be used to push-deploy once we are happy with the code state of the ‘master’ branch.

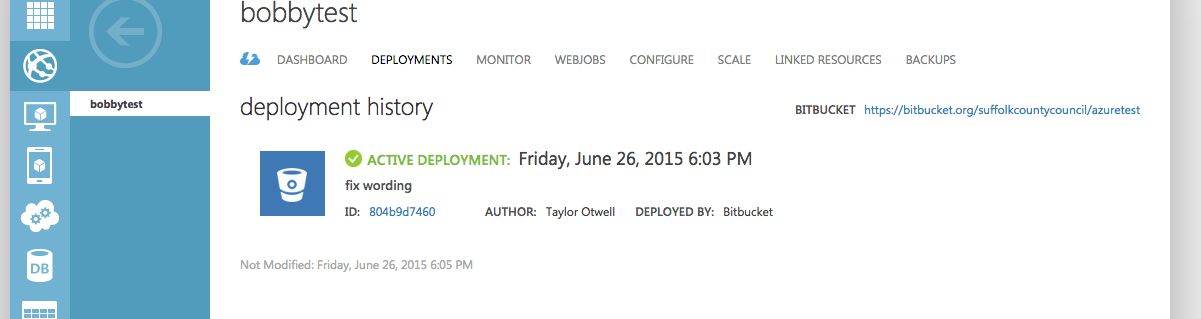
Clicking on the finish button, will start an automatic deployment of your code to your application instance as shown here:

Once deployment has finished the screen will change to following showing the latest commit message and author details etc.
Any new code pushed to the ‘master’ branch will now trigger an automatic deployment of the code (including a “composer install”).
If you’ve deployed a clone of the vanilla Laravel codebase, you should now be able to view your site using your application URL, in this example it would be: http://bobbytest.azurewebsites.net.
If you need to run database migrations however (your application is using a DB) then you’ll need to access the CLI to run those first of which we’ll cover now…
Running artisan tasks and using the CLI
Using the Debug Console in Kudu we can execute CLI commands, we can check the version of PHP that is running, run artisan console commands as well as run composer commands etc.
Let’s now jump back to the Kudu management panel (eg. http://bobbytest.scm.azurewebsites.com) and lets bring up the CLI, so just click on ‘Debug Console > CMD’ from the top navigation bar and lets run a few example commands to check that everything is working as required:
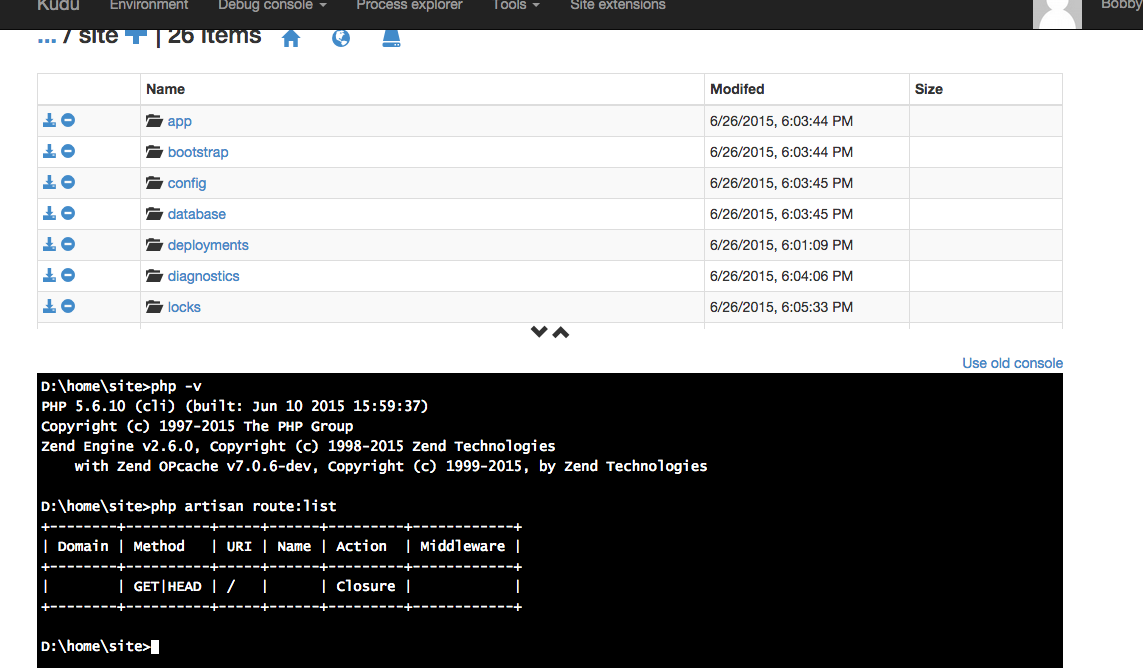
Change (cd) into the ‘D:\home\site’ directory of which will then enable you to execute artisan commands and general command prompt commands (eg. copy, move etc.)
As per my screenshot above, you can type ‘php -v‘ to display the current version of PHP that is running, you can also call your artisan console commands and composer commands too as required.
That’s pretty much it….
Well hopefully this post helped you get your Laravel 5.x application hosted on Windows Azure, feel free to comment on this post and ask any questions you may have etc.
5 replies on “Configuring and hosting Laravel 5.x applications on Windows Azure”
[…] Configuring and hosting Laravel 5.x applications on Windows Azure […]
[…] Configuring and hosting Laravel 5.x applications on Windows Azure […]
[…] Configuring and hosting Laravel 5.x applications on Windows Azure […]
[…] Configuring and hosting Laravel 5.x applications on Windows Azure […]
[…] http://blog.bobbyallen.me/2015/06/26/configuring-and-hosting-laravel-5-x-applications-on-windows-azu… […]