
In this post I’m going to walk through the process of installing Jenkins and using Pipelines to configure multi-stage parallel builds that test our code against multiple PHP versions in isolation.
This setup means that we do not have to install and maintain multiple versions of PHP with multiple PHP extention requirements on our Jenkins build server and/or remote build agents.
We will achieve this by using Docker containers which we will use to provision isolated (containerised) build agents that each have their own build environments that will spin up during tests and automatically destroy once the test pipeline is complete.
Some context to this – Some of my opensource projects I have hosted over at GitHub I use TravisCI to build and test my opensource packages/libraries against multiple PHP versions as I want to ensure that my libraries can be used against as many versions of PHP as possible; TravisCI can be used for free for public respositories but my private side-projects generally only get tested on the latest version of PHP that I’m running on my production servers and whilst this is fine (as long as it works in PROD right 😉) I thought I’d tackle the process of setting up my own hosted TravisCI environment using Jenkins which I can use for private package/library testing in future.
This blog post will also serve as a foundation to a future post where I will cover how to build production containers (from Dockerfiles), running tests, pushing to a private Docker registry and then deploying to a Kubernetes cluster using Jenkins Pipelines which ofcourse serves a different use case but is super interesting and becoming a more common/new standard way of deploying and hosting large scale web applications.
Provisioning a virtual server
I recommend using DigitalOcean for this as I find their pricing is easy to understand and estimate your monthly costs meaning that you’ll never get any nasty suprises – if you use this link when you sign up, you’ll get $100 of free credit too.
I would recommend provisioning a 2GB virtual server instance (as a minimum) and if you are going to follow along with this blog post ensure that the image you choose is Ubuntu 18.04.
Getting updates and installing Docker
Once your server has been provisioned, you should SSH into the server like so:
ssh root@{your-server-ip}
At the terminal we will now install all system and package updates that are available to us:
sudo apt-get update -y
sudo apt-get upgrade -y
Next we will install some utilities and add the official Docker repository to our server.
sudo apt-get install -y apt-transport-https ca-certificates curl
curl -fsSL https://download.docker.com/linux/ubuntu/gpg | sudo apt-key add -
sudo add-apt-repository "deb [arch=amd64] https://download.docker.com/linux/ubuntu $(lsb_release -cs) stable"
Now we can update our package sources and then install Docker using these comands:
sudo apt-get update
sudo apt-get install docker-ce
At this point you may consider disabling automatic updates to Docker to ensure that your server remains stable and no build interuptions will occur when you least want them (you’ll have to manaully update it later as required though but atleast you can set expectations on your development staff). I would recommend it in this instance, therefore run this command to hold the automatic updates:
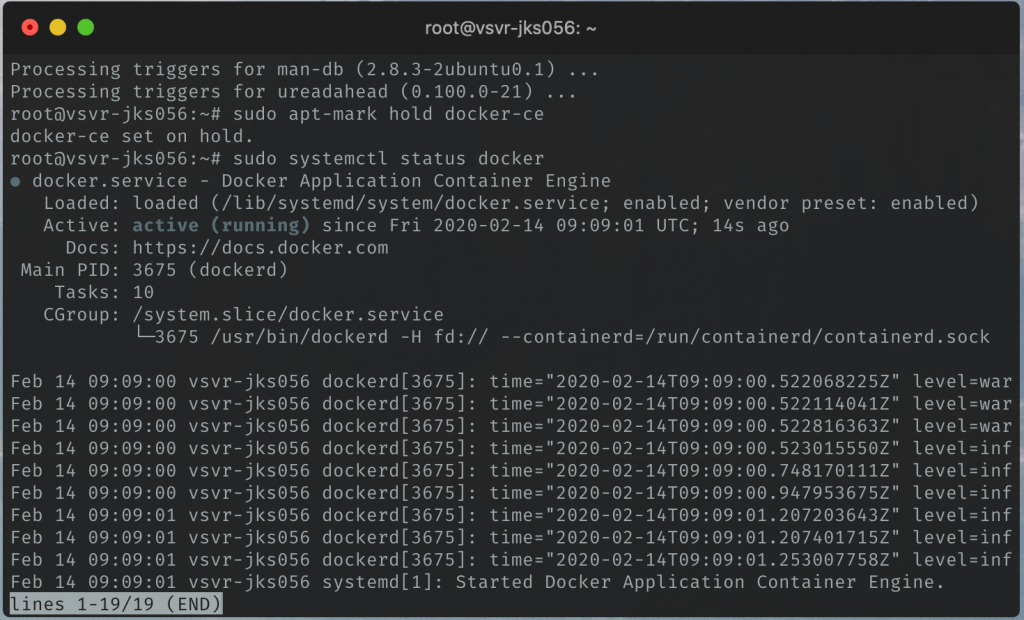
sudo apt-mark hold docker-ce
Finally, lets check the status of Docker and check that it is running:
sudo systemctl status docker
We should see the following output indicating that Docker is running:
Installing Jenkins
At the time of writing Jenkins does not support the latest major Java versions (10 and 11); we will therefore install Java 8 and will choose to use OpenJDK which we can install like so:
sudo apt-get install openjdk-8-jdk -y
Now that we have the JDK installed we can now add the Jenkins repository and proceed to install Jenkins:
curl -fsSL https://pkg.jenkins.io/debian/jenkins.io.key | sudo apt-key add -
echo deb http://pkg.jenkins.io/debian-stable binary/ | sudo tee /etc/apt/sources.list.d/jenkins.list
Let’s now update our package sources and install Jenkins like so:
sudo apt-get update
sudo apt-get install jenkins -y
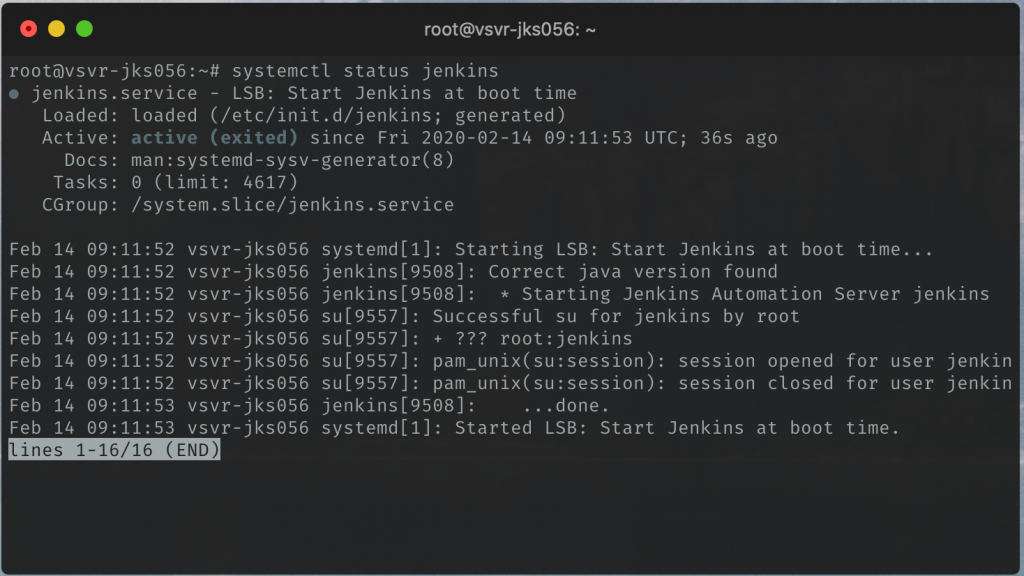
As we did with Docker, let’s check the status of the service like so:
systemctl status jenkins
We should see the following output:
Adding our Jenkins user to the Docker group
Jenkins will be issuing commands to Docker, Jenkins runs on our server using the jenkins system user. In order for our jenkins user to be able to interact with our Docker instance we need to add the user to the docker group.
We can add the user to the Docker group like so:
sudo usermod -aG docker jenkins
Now check that our Jenkins user can interact with Jenkins by running the following command:
sudo -u jenkins docker ps
We should get the following output proving that we have it setup correctly.

You can ignore the message that states WARNING: Error loading config file: /root/.docker/config.json: stat /root/.docker/config.json: permission denied – This is normal when running using sudo -u. The main thing we’re looking for is that we see the headings as indicated in the above screenshot.
Setting up Jenkins
We can now move on to finalising our installation in the browser.
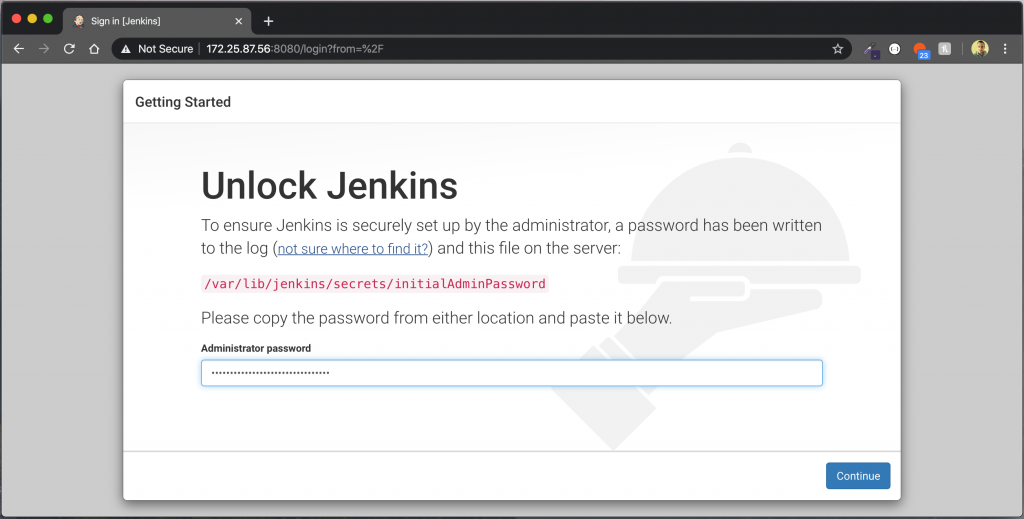
First we need to retrieve (and copy) the randomly generated admin password which can be viewed by running:
sudo cat /var/lib/jenkins/secrets/initialAdminPassword
It should appear like so:

Now open up your web browser and navigate to the following URL:
http://{your-server-ip-address}:8080
You should now be shown the following screen, paste in the randomly generated password into the text field and then click Continue to unlock Jenkins and enable us to continue with setting up our server:
The next screen will ask you to Customize Jenkins, you will be given two options here; either to Install suggested plugins or Select plugins to install – I simply choose the default option [Install suggested plugins]
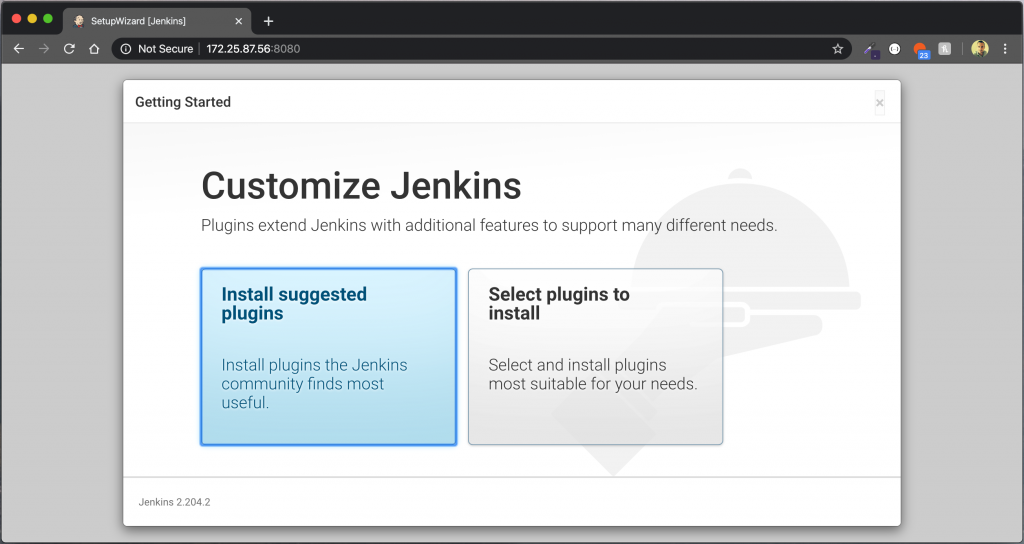
The installation of various packages will then start, it will take a few minutes so hold tight 😉

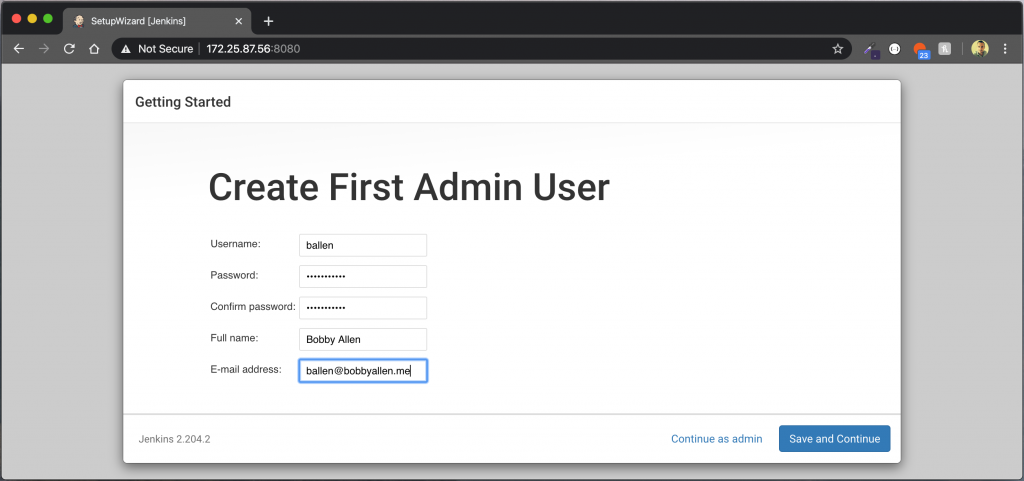
Once the packages have been installed, you will be prompted to create your first admin user, at this screen enter your credentials as desired and then click Save and Continue as shown below…
The next screen will prompt you to set your Jenkins URL, by default it takes the URL from the current browser request (eg. http://172.25.87.56:8080) however I know that I will be hosting this server behind a reverse proxy and will be configuring SSL, therefore it is important for me to enter the public address (that I will use to access it on in future), this may not be the case for you and if not, you can simply keep your current value as it.
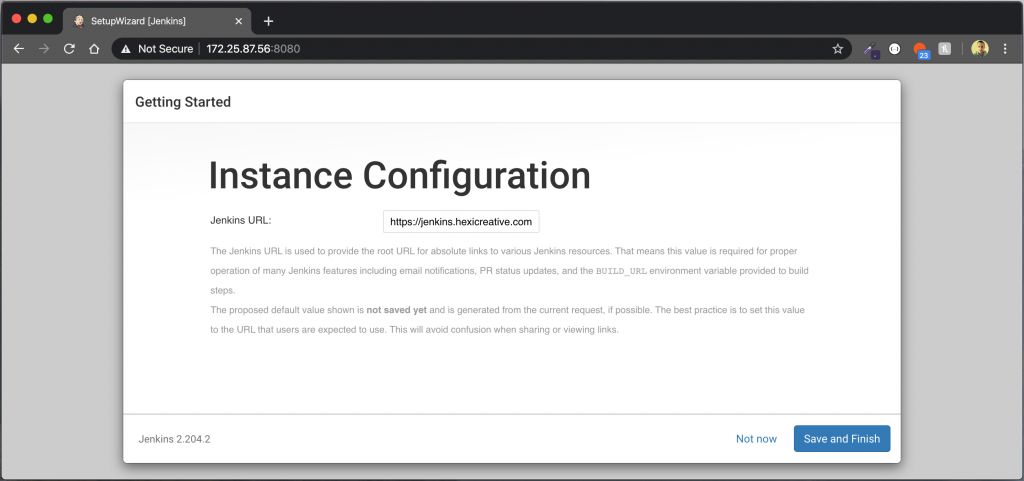
The Jenkins URL value doesn’t prevent you from using the default IP address:port or other hostnames that resolve to the same IP address, it is used mainly on outbound email links etc.
Finally, click Save and Finish to complete the initial setup process.
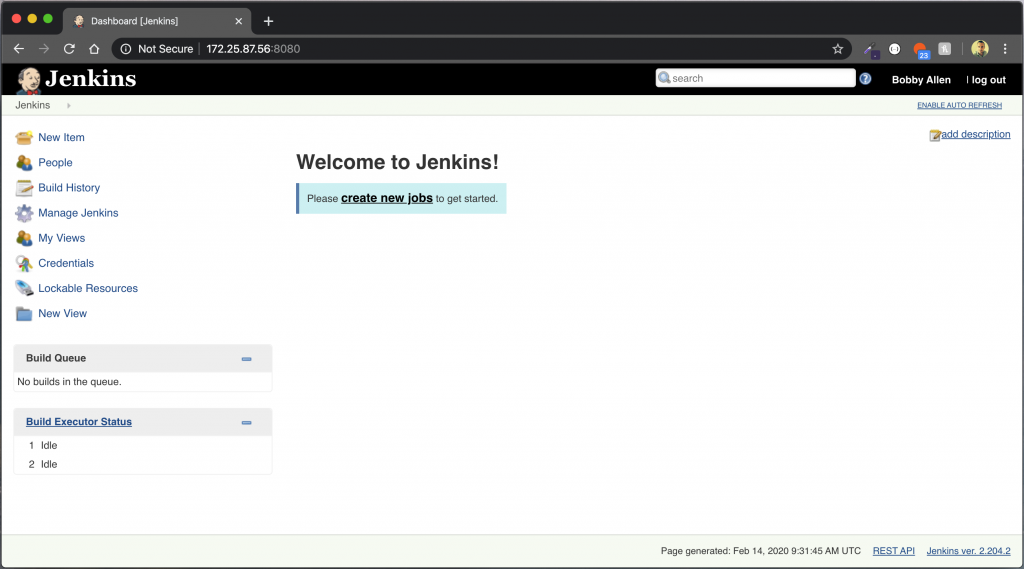
Congratulations, you now have Jenkins setup and should be looking at the main Jenkins dashboard…
Installing the BlueOcean plugin
BlueOcean is a modern interface for Jenkins and provides the pipeline functionality that we want to use going foward.
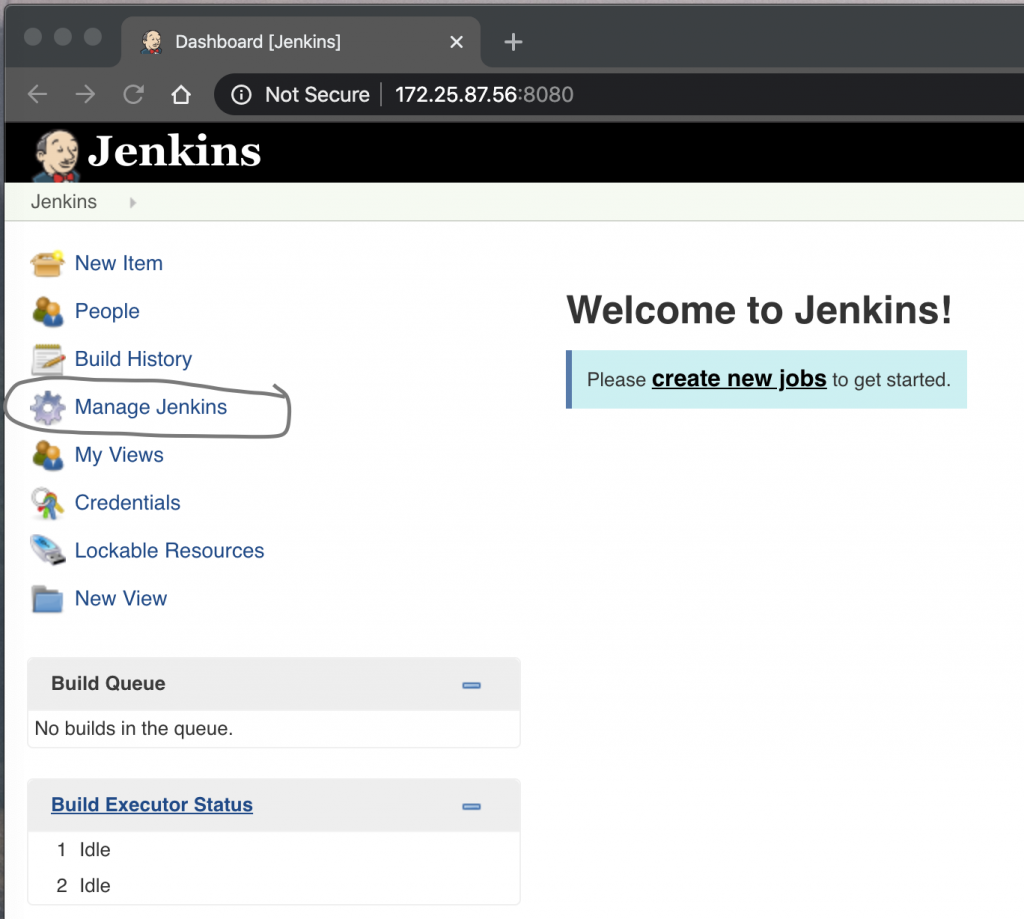
On the dashboard view, clcik on Manage Jenkins:
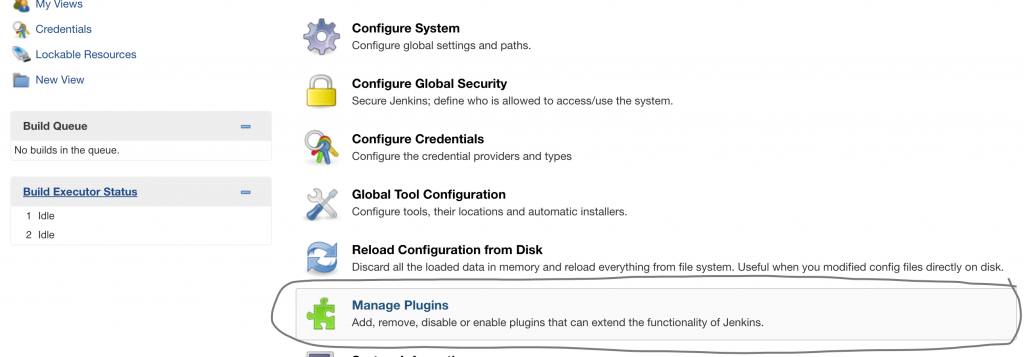
From the list of options that will appear, click on Manage Plugins:
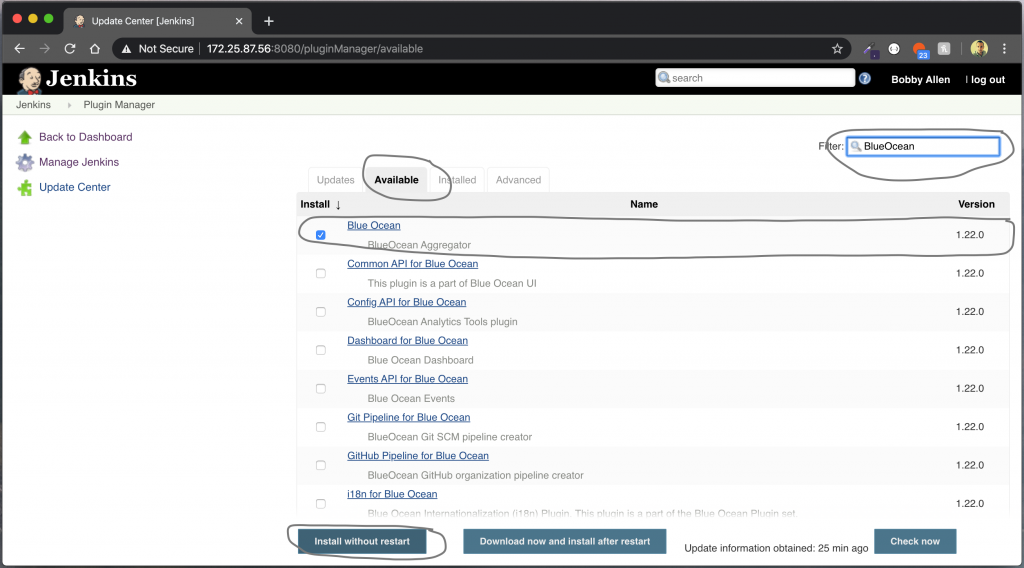
On the Plugin Manager Screen, click on the Available tab, then using the Filter text field, type BlueOcean, the list of available plugins should automatically update. Check the Blue Ocean plugin and then click Install without restart…
The plugin and all other dependencies will now install, once they are all shown as successful, click on the Go back to top page link.
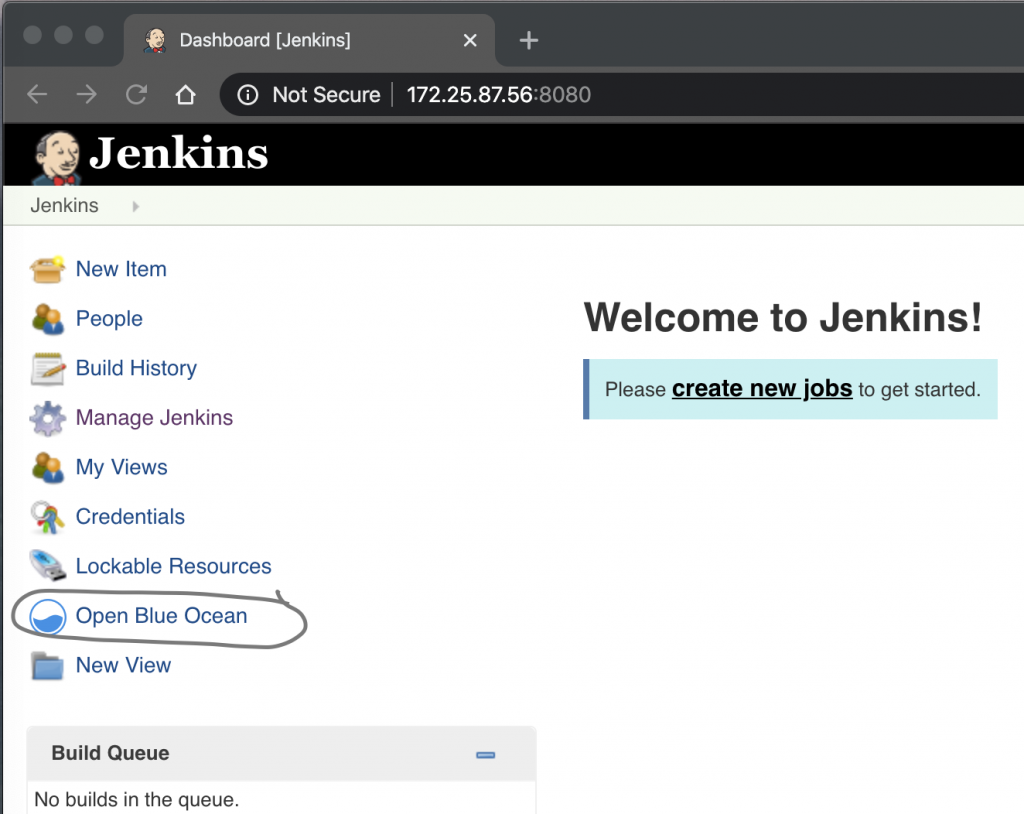
Now that w’re back on the Dashboard view, the new open Open Blue Ocean will be available to us – Click on this!
You should now be greeted by this screen:
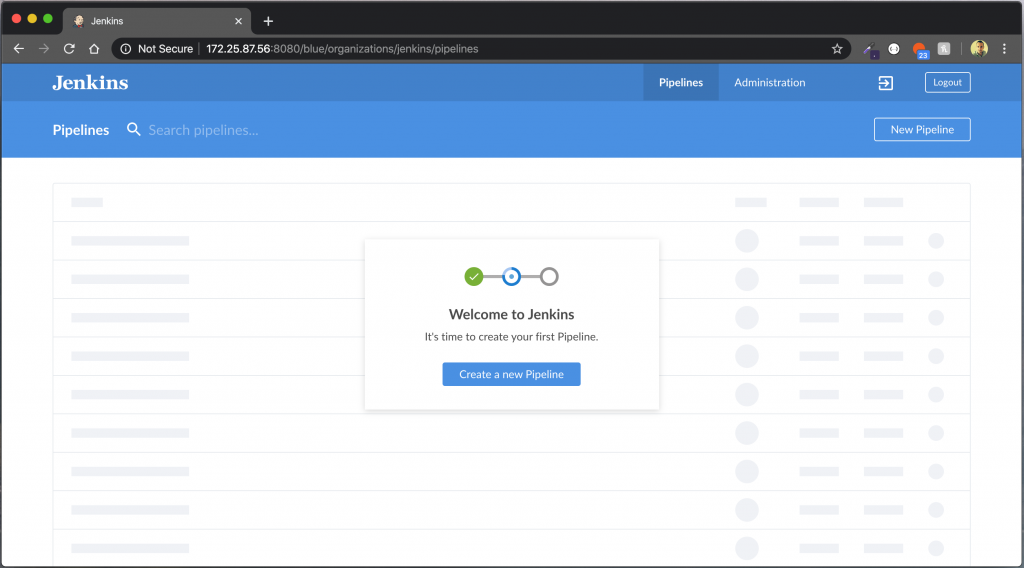
Click Create a new Pipeline to continue…
At this point, please ensure that you have a GitHub repository setup (it can be public or private repository). I expect that your PHP project contains a composer.json file and has PHPUnit tests setup. If you do then you should be able to add this Jenkinsfile (be sure to update your Git repository URL in this file though!) to the root of your project and we can move on.
If you don’t currently have a GitHub repository that meets the above criteria then please go and clone my demo repository here to ensure that you can continue to follow along and test it out for yourself.
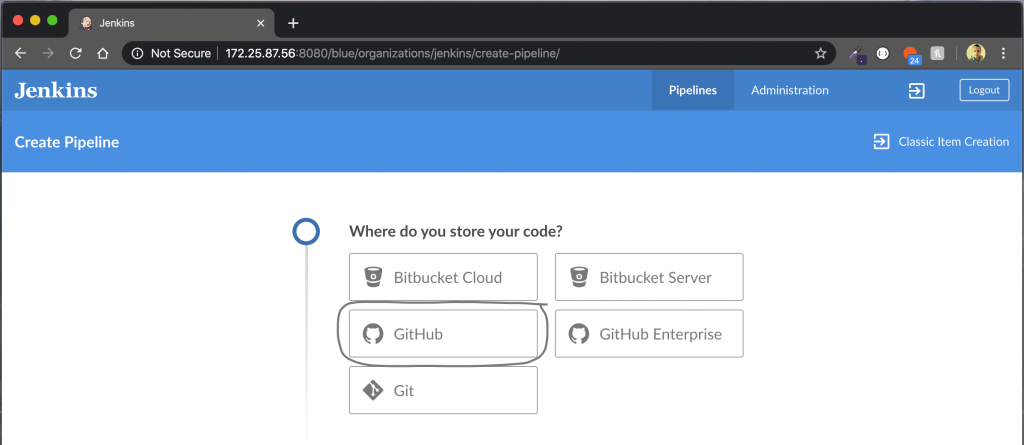
You will now be asked where you store your code, if your SCM hosting platform isn’t listed, select Git. In this example I will choose GitHub.
In order to connect Jenkins to GitHub you’ll be asked for an access token, use the link Create an access token here. to generate one, then paste into the text field before hitting Connect.
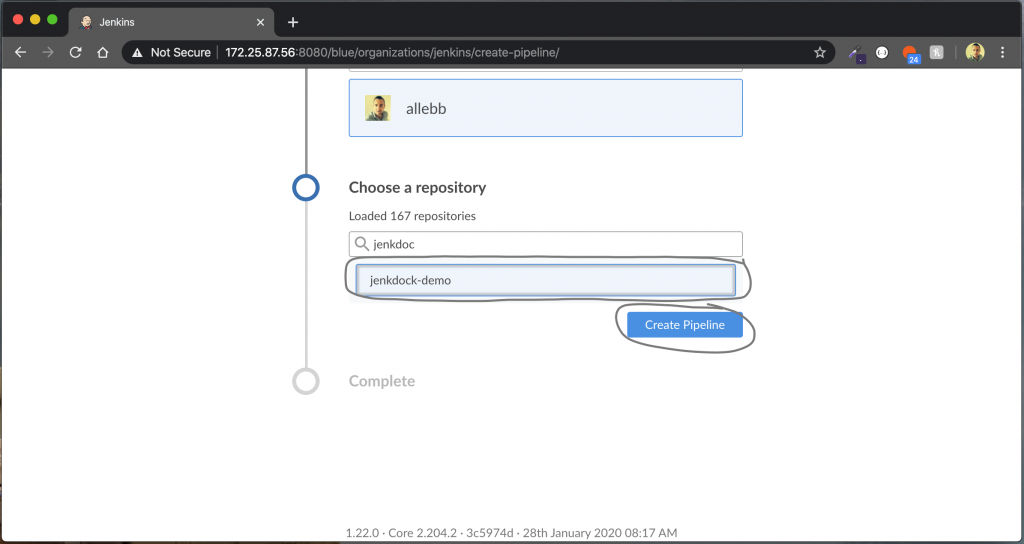
You will then need to find and select your repository from the list that is returned. For this blog post I cloned one of my PHP packages and pushed to a new repository named jenkdock-demo. Once you have your repository selected, click on Create Pipeline.
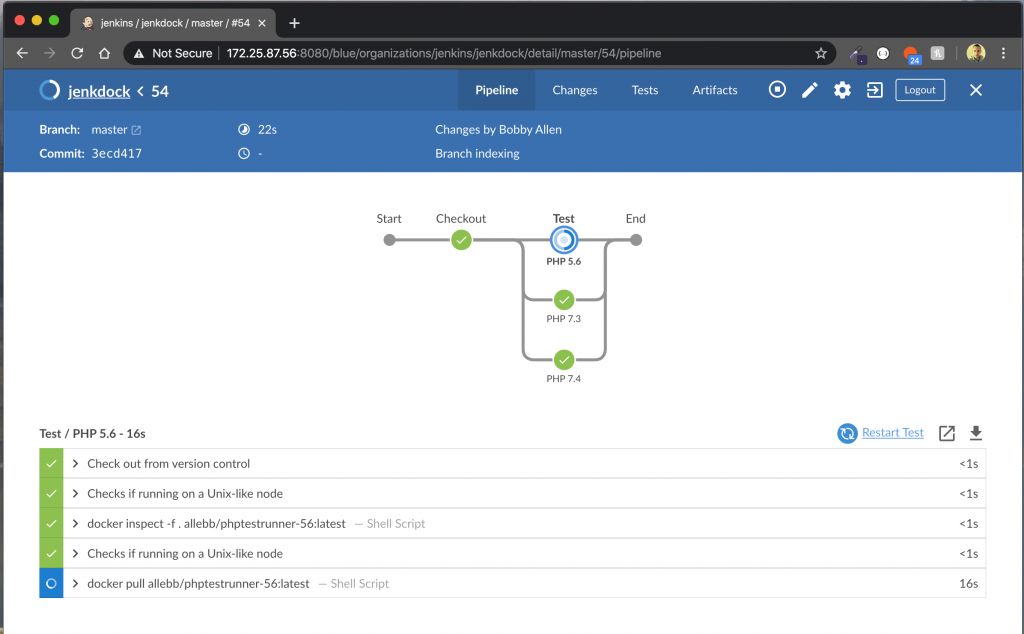
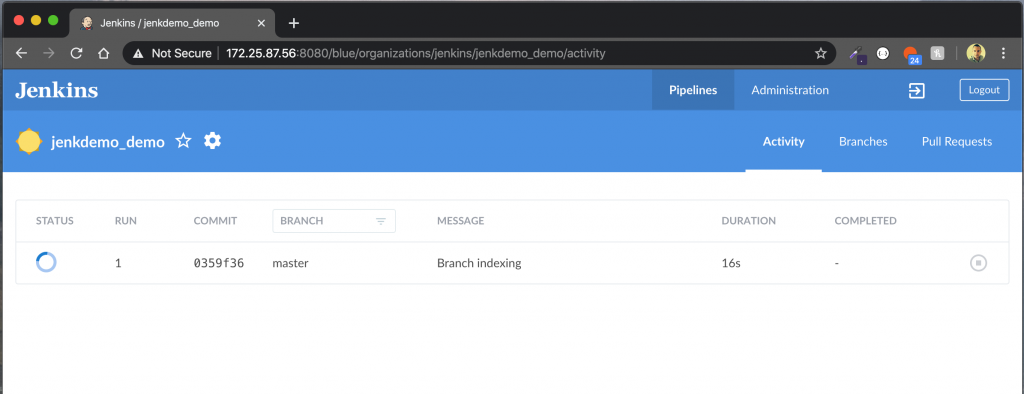
Once the pipeline has been created by Jenkins (it does this by cloning our Git repository and detecting the Jenkinsfile in the root) it will immediately start a build and take you to the dashboard as shown below.
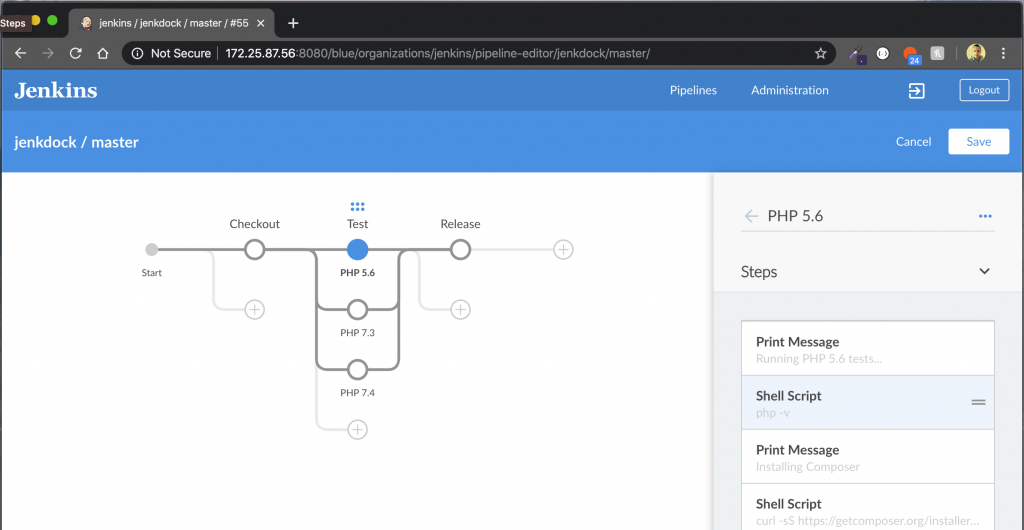
If your repository didn’t contain a Jenkinsfile in the root, you will instead be taken to the Pipeline editor which will allow you to constuct a pipeline (when “saving” the pipeline confgiuration it will also automatically commit this to your Jenkinsfile in your repository automatically) from my experience though, this editor is limited and would recommend that you instead edit the Jenkinsfile in a text editor or IDE before committing back to SCM.
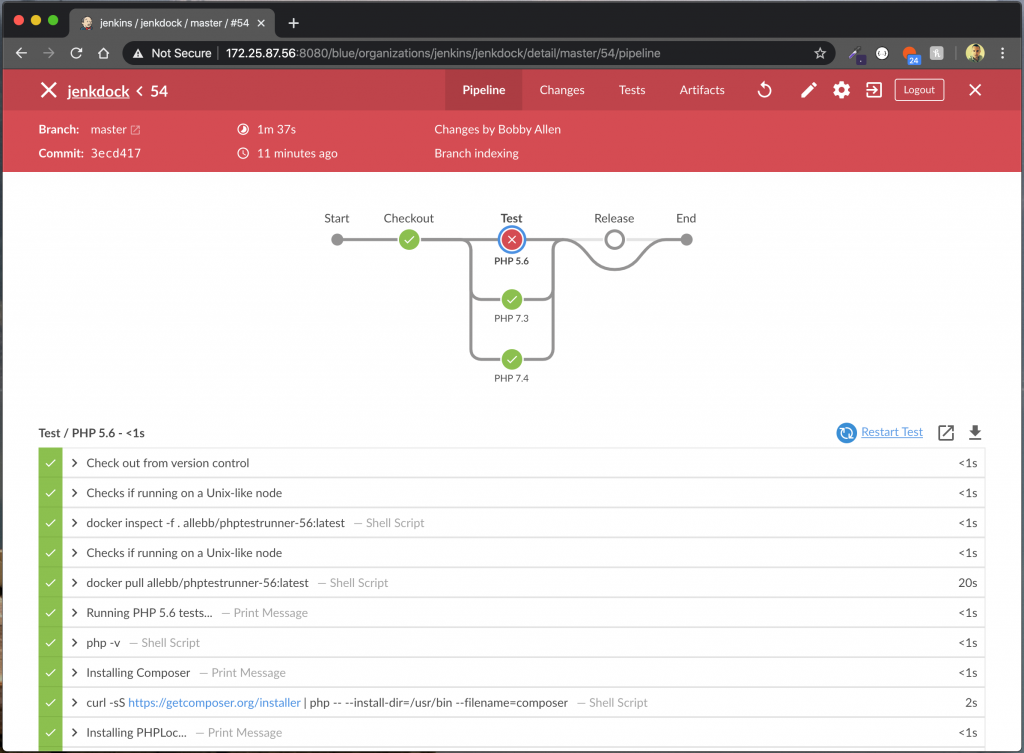
If you’ve not already reviewed the provided Jenkinsfile, in summary, the pipeline is configured to do the following things:
- Clone our source code from GitHub.
- Spin up multiple Docker Containers that Jenkins uses as containerised build agents (on container for each version of PHP – 5.6, 7.3 and 7.4). These are contianers that I’ve built and pushed to my public Docker Hub registry you could build your own or simply use mine.
- Install Composer inside the container (ensuring we get the latest version).
- Installing our project’s Composer packages from our composer.lock file (falling back to composer.json).
- Running the PHPUnit tests and generating code coverage.
- Publishing the test results to Jenkins and the publishing the code coverage reports.
- …you can then extend the pipeline to trigger a deployment, run additional code analysis (such as PHPMD, PHP_CodeSniffer, PHPStan etc) or whatever you may need!
If all the tests pass across each of the PHP versions then the pipeline will move to the next stage (eg. Release) at this point you could then configure your pipeline to merge your code with specific branch eg. from dev-master to master (as you know all unit tests passed) or maybe “hit” a webhook to trigger a GitHub package release which in-turns pushes the release to Packagist etc.) – It’s entirely up to you and beyond the scope of this post but you get the idea!
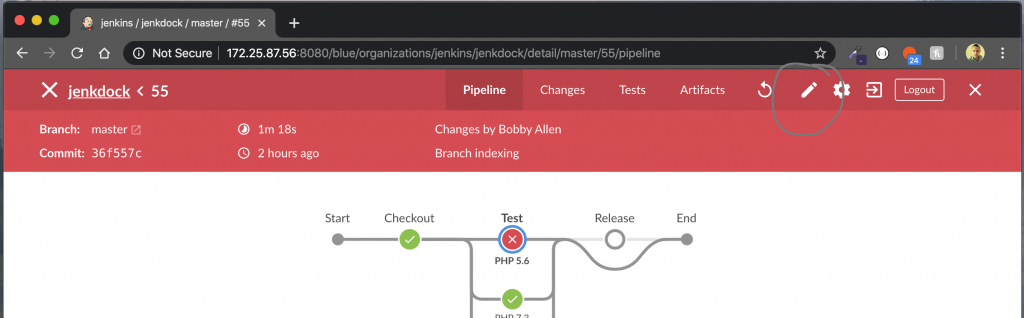
If you want to use the built in pipeline editor, you can use the icon in the screenshot below to open it (as I’ve already warned above though, the pipeline editor only covers a small fraction of the functionality that you can add to your Jenkinsfile so you are restricted as to what you can achieve using the editor):
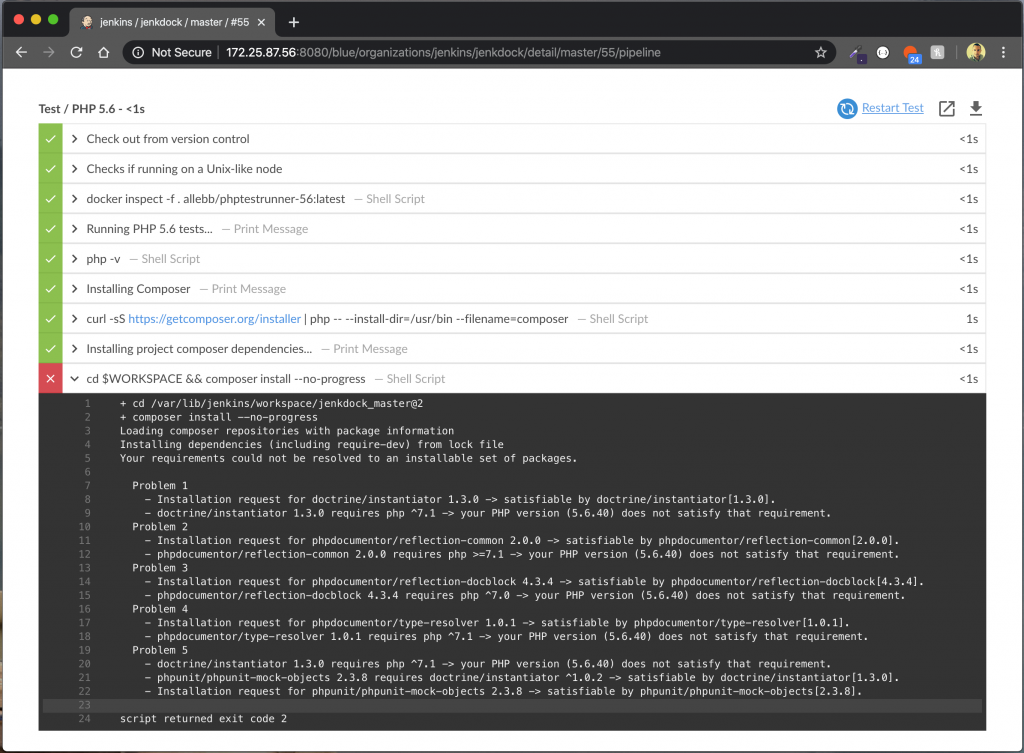
Trying not to sidetrack too much, we’ll get back on track 😉 – When our build fails (on purpose for this demo’s purpose) due to Composer dependency issues for PHP 5.6 only, the failed version build will prevent our pipeline reaching our release stage and effectively protects us against release broken code, this is visualised here…
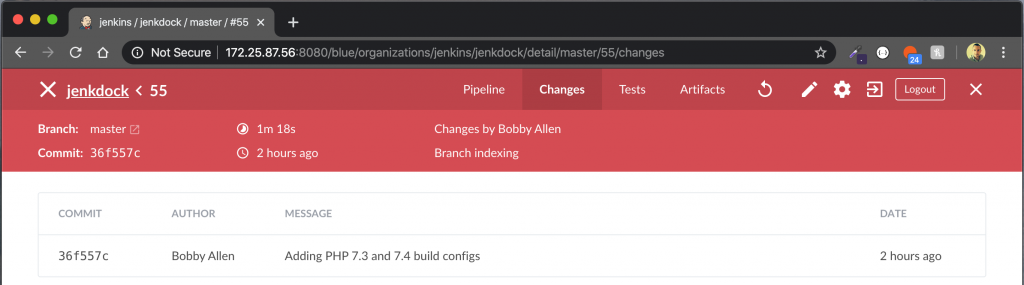
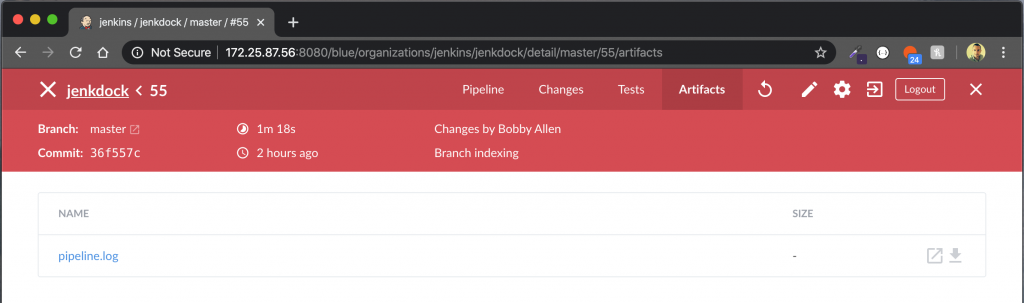
We’ll quickly cover some of the other sections in our pipeline build results screen with these screenshots:

Hopefully you found this useful and as a starting point to build out and extend your own pipelines.