
Last weekend I blogged about installing Jenkins (and the Blue Ocean interface) and using Jenkins Pipelines to test against multiple PHP versions in parallel – something that you’d want to do if you were developing and deploying PHP libraries and packages.
Using the same Jenkins server that we installed in my last blog post, today I’m going to cover setting up a build pipeline that is common when you plan to host your applications in a Kubernetes (K8s) cluster.
This post will cover the process of building, testing, and publishing Docker containers to a Docker Registry; the last stage would then be to trigger a deployment to a Kubernetes cluster which I’ll cover in my next blog post.
Our pipeline will essentially do the following tasks in this order:
- Checkout our application source code from a Git repository.
- Build our Docker image.
- Run our tests (inside the built container).
- If the tests all pass, we’ll then automatically push our Docker image to a Docker Registry (I’ll cover both Docker Hub and a private registry)
Like I did in the last blog post, I have set up a public Git repository on GitHub that we will be using throughout this tutorial series; I would recommend that you clone it to your own GitHub repository now so that you can work along with me.
The demo repository that you’ve just cloned contains a Jenkinsfile at the root level – I have already configured the pipeline that we will use for this tutorial so go and take a quick look at the file now and get a feeling of what it is doing – it should be pretty simple to follow.
The other important file that can be found in the root of the repository is the Dockerfile file – the Dockerfile content is very simple and as follows:
FROM phpdockerio/php74-cli:latest

# Make a directory to house our application code in.
RUN mkdir /app

# Copy our code into our /app directory
COPY . /app

# Set the WORKDIR to our app directory
WORKDIR /app

# We will now install our composer dependencies:
RUN cd /app && composer install --no-progress

# Set some permissions...
RUN touch /app/.phpunit.result.cache && chmod 755 /app/.phpunit.result.cache
RUN chmod 755 -R /app/storage/

# Expose TCP 8000 so we can access our application externally.
EXPOSE 8000

# We'll run the default PHP web server to serve our application (just for demo purposes - normally you would use PHP-FPM!)
CMD ["php", "-S", "0.0.0.0:8000", "-t", "public"]
During the build stage of our pipeline, we instruct Jenkins to build our Docker image using the above instructions; I won’t go into detail about what the Dockerfile instructions are doing (although I have commented a brief summary above each line in the code snippet above which should help if you’ve not used Docker before.
If you want to know more about the Dockerfile syntax, I would recommend you head over to the official Docker website.
Pushing the container image to Docker Hub (a public repository)
You can skip directory to the “Pushing the container image to a private registry” section below if you do not intend on using Docker Hub.
So first we will cover pushing to Docker Hub, if you don’t yet have an account you should register one now (it’s free!)
We will now locate this section in our Jenkinsfile and update it to match your own settings:
environment {
  imageName = 'allebb/jenkkube-demo'
  registryCredentialSet = 'dockerhub'
  ...
}
When using Docker Hub, we must set the imageName variable to be prefixed with your DockerHub username (and a forward slash) as this is required by Docker Hub. This would be different when using your own private registry and is covered in the next section of this blog post.
So, if you haven’t already done so, you should now replace the imageName variable with your own value. As an example, if your Docker Hub username is jbloggs and your project or app was called DemoApp, you should choose to use jbloggs/demo-app as shown in the below example…
environment {
  imageName = 'jbloggs/demo-app'
  registryCredentialSet = 'dockerhub'
  ...
}
Once you have set your imageName variable, save your Jenkinsfile and commit your changes back to your git repository now!
The only other thing we need to do now before we test it is to create a Credential Set on your Jenkins server (making sure we name it dockerhub to match our registryCredential value) as the server needs to authenticate with Docker Hub when it pushes your image.
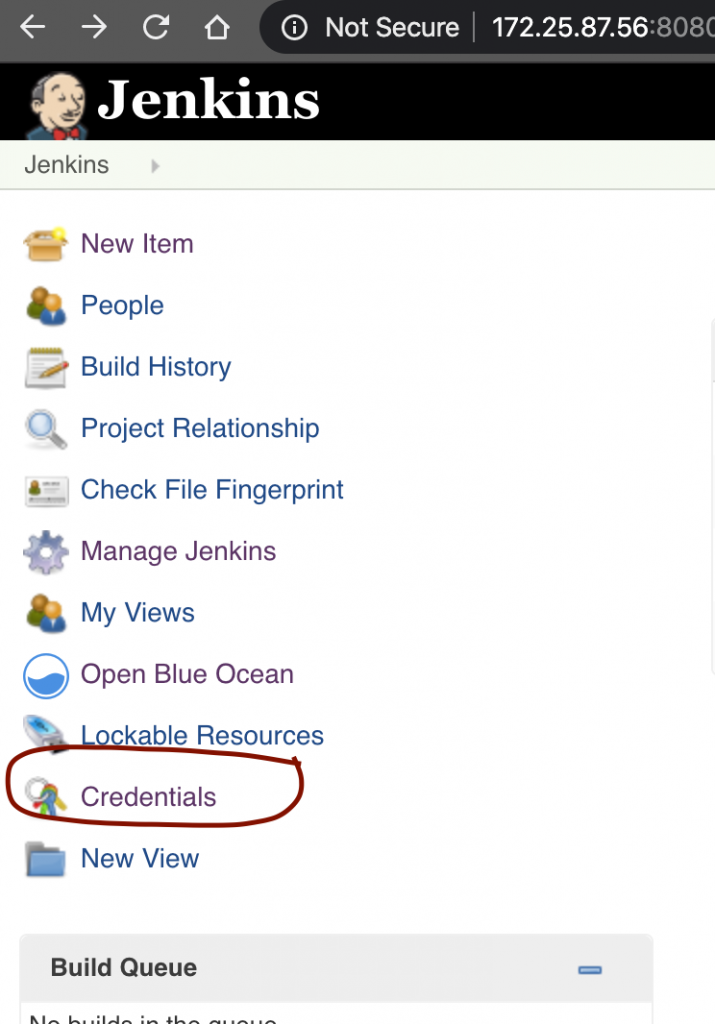
To do this, from the Jenkins dashboard we must click on the Credentials link:
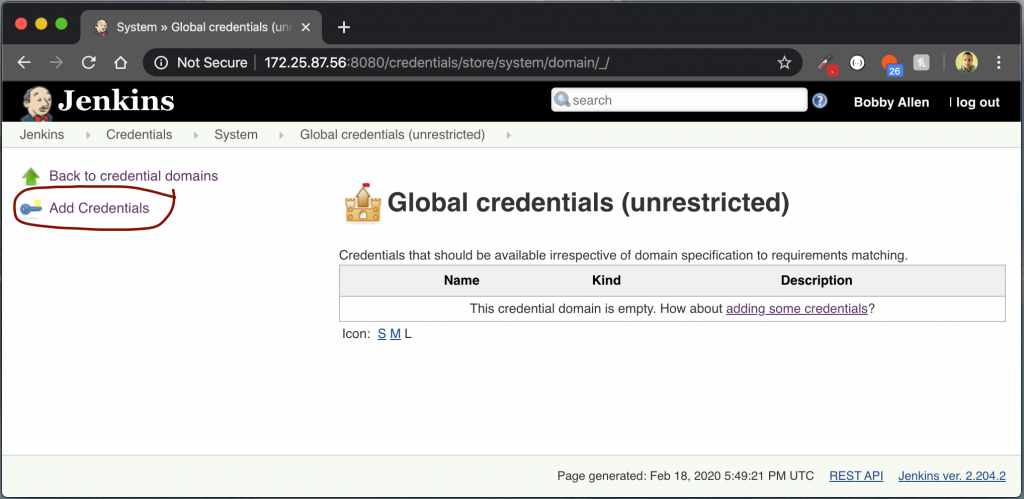
We will now be taken to the Global Credentials page, use the Add Credentials link as shown below to create a new credential set.
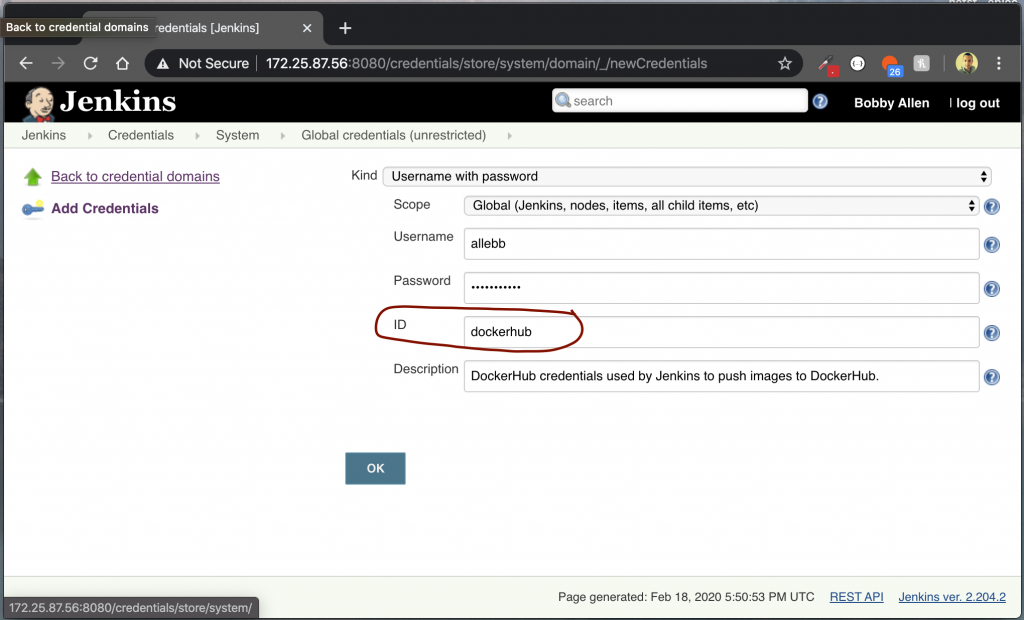
On the credentials screen, complete the form as shown below, the username and password field should match your Docker Hub account.
As a reminder… the most important thing here is to ensure that the ID field is named dockerhub (as this is what our Jenkinsfile is configured to use when authenticating with Docker Hub).
Click OK to complete this stage. We can now head back over to the BlueOcean portal and create the new pipeline.
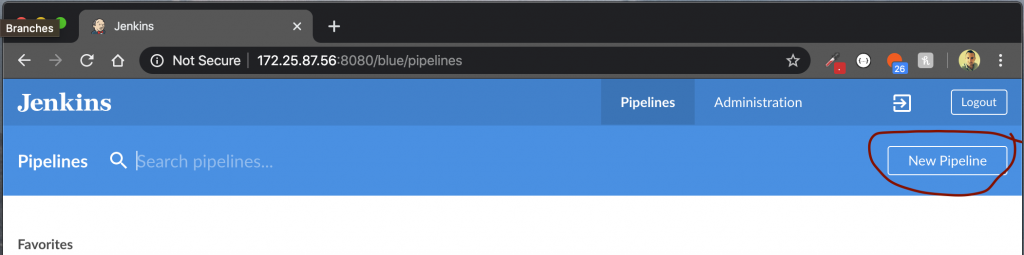
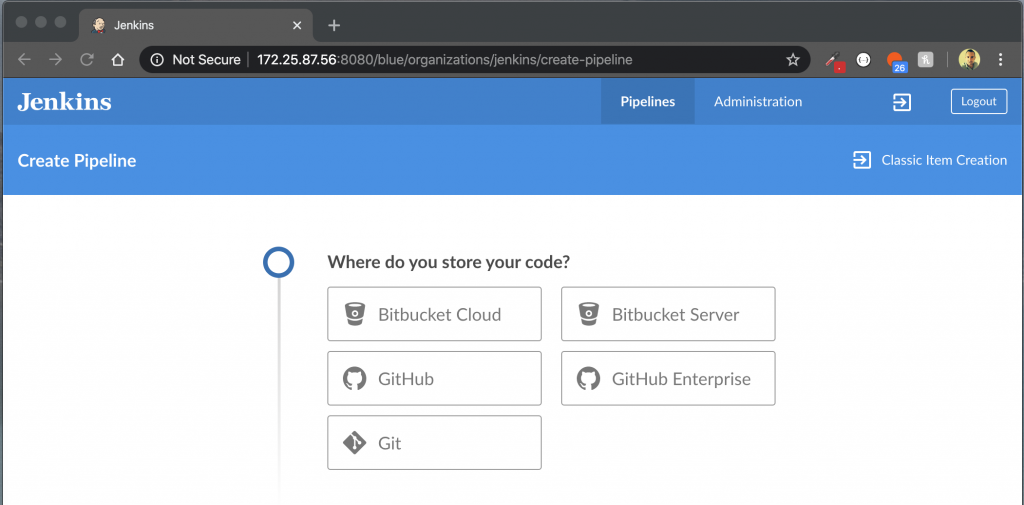
So, same as before now – we’ll click on the New Pipeline link from the BlueOcean portal here:
We’ll now be asked to specify where we keep our code.
Configure your repository and select the project; you can refer back to my original tutorial if you need to.
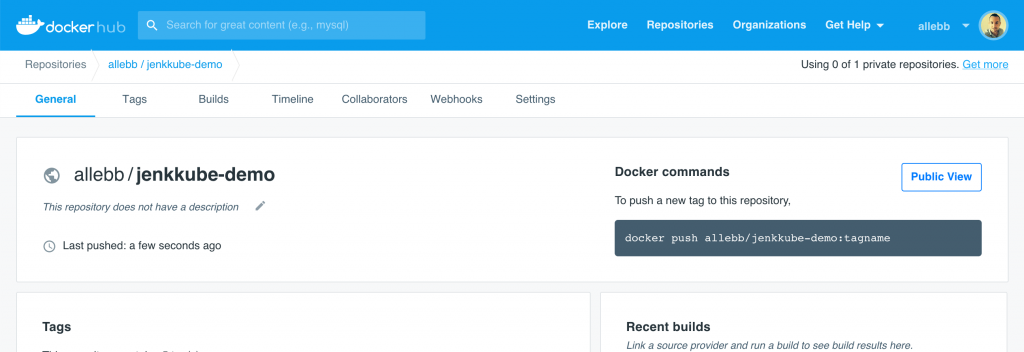
Once you have completed that, your project should start building automatically and assuming all goes to plan, you should very shortly find that you a new container pushed to your personal DockerHub registry dashboard!
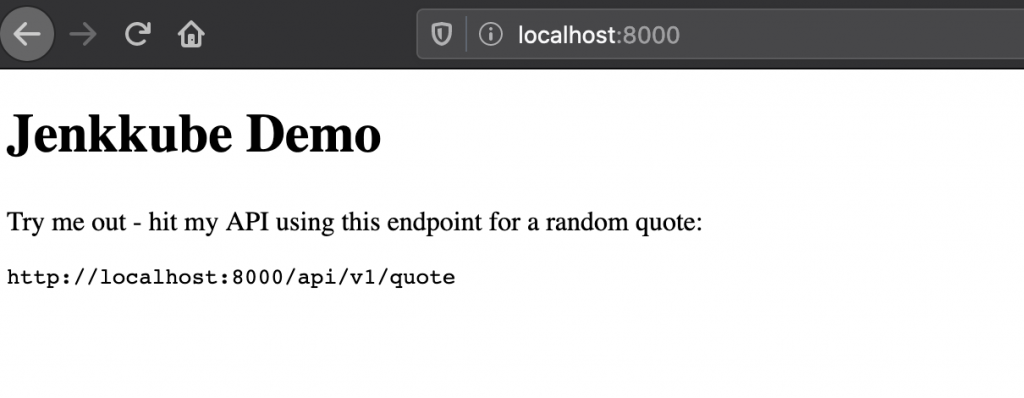
Let’s test out the image – we can now pull and test it locally by running the following command on your local machine (change the image name to match your settings):
docker run --rm -p8000:8000 -e APP_KEY="base64:nsd2ZdnWmbb/coW6qGQMEE5aupd52tTY4h6jcVedSZY=" -e APP_ENV="production" allebb/jenkkube-demo:latest
You should be able to access this on your local machine using http://localhost:8000 proving that it is working as we expect!
This concludes pushing our built images to Docker Hub.
If you’re interested in pushing to your own private registry, please continue on to the next section…
Pushing the container image to a private registry
If you don’t already have a private registry server setup, you can following this guide at the Docker website – The Docker Registry itself is distributed as a Docker Container so it’s super easy to setup and you should be up and running in no time.
In order to push our container image to our own private registry we need to update a few lines in the Jenkinsfile (in this example, my private registry is hosted at https://registry.hexicreative.com – I used an Nginx Reverse proxy and configured LetsEncrypt SSL too but it’s up to you how you want to host your registry) – you should now update the configuration below to match your environment:
environment {
  imageName = 'jenkkube-demo'
  registryCredentialSet = 'hexi-registry'
  registryUri = 'https://registry.hexicreative.com'
    ...
}
Notice that we do not pass a prefixed username in the imageName variable this time (as we’re using a private registry and isn’t required)!
Now that we have updated our environment variables, we need to make a final change in our Jenkinsfile; and depending on if you’re private registry is using authentication or not, you will need to make the following change:
Replace this line in our Jenkinsfile (line #37) that contains:
docker.withRegistry('', registryCredentialSet) {
- If your repository requires authentication, you should replace the above line with:
docker.withRegistry(registryUri, registryCredentialSet){
- If you’re only testing and happy in the knowledge that you’re not using authentication you should instead replace the line with:
docker.withRegistry(registryUri) {
If you did configure and are using authentication for your private registry (which I would highly recommend!) you will also need to configure a new Credential Set in Jenkins as we did for our Docker Hub credentials (in the above example, I named mine ‘hexi-registry’) – Go and do that now before we test!
Now save and commit your changes again!
Great stuff… we’re nearly done!
Let’s now test this all by triggering another build within Jenkins.
…checking the mounted volume path for your Docker Registry container you should now see a newly-created directory (the directory name will be the value of your imageName variable), on your host machine you can check it by running:
ls {path-to-volume-mount}/registry/v2/repositories
You can also test by pulling and running the image on your machine like so:
docker run --rm -p8000:8000 -e APP_KEY="base64:nsd2ZdnWmbb/coW6qGQMEE5aupd52tTY4h6jcVedSZY=" -e APP_ENV="production" registry.hexicreative.com/jenkkube-demo:latest
Opening your browser and navigating to http://localhost:8000 should present you with the demo app landing page!
What’s next?
So we’ve now covered building, testing and pushing successfully built and tested container images to a Docker registry; the next step would be to trigger and have our application deployed to a Kubernetes cluster – I’ll cover this in my next blog post!