
I’m really liking what Microsoft have been doing recently with pushing more of their products down the open-source channels and supporting Linux and Mac operating systems.
Earlier this year Microsoft released SQL Server vNEXT which can be installed and ran on Linux.
In this post I will cover the process of installing and configuring Microsoft SQL Server on a Ubuntu Linux LTS (16.04) server and addition of creating a database, a user account, configuring the server firewall and automating daily backups of your databases.
This tutorial requires your server to have at least 4GB of RAM (recommended as a minimum for MSSQL server vNEXT by Microsoft) and that your server is running Ubuntu 16.04. It is also recommended that you are logged into your server with a non-root user which has sudo rights granted.
Let’s get going…
Installing SQL server
To install SQL server we need to add a package repository, we will do this by running the following commands:
curl https://packages.microsoft.com/keys/microsoft.asc | sudo apt-key add -
curl https://packages.microsoft.com/config/ubuntu/16.04/mssql-server.list | sudo tee /etc/apt/sources.list.d/mssql-server.list
We will now update our package lists:
sudo apt-get update
We can now install Microsoft SQL server using this command:
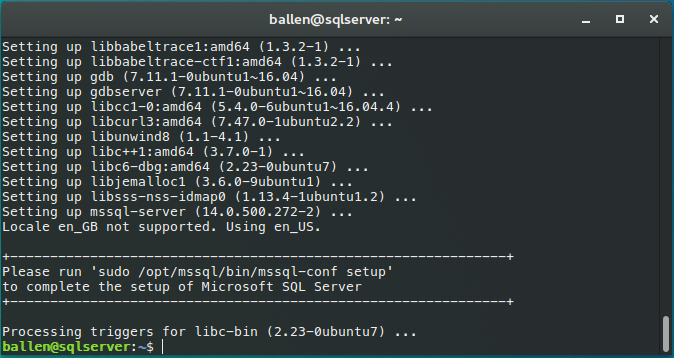
sudo apt-get install mssql-server
All going well, Microsoft SQL Server vNEXT is now installed and as per the below screenshot we now need to configure it using the supplied command:
Lets run that now:
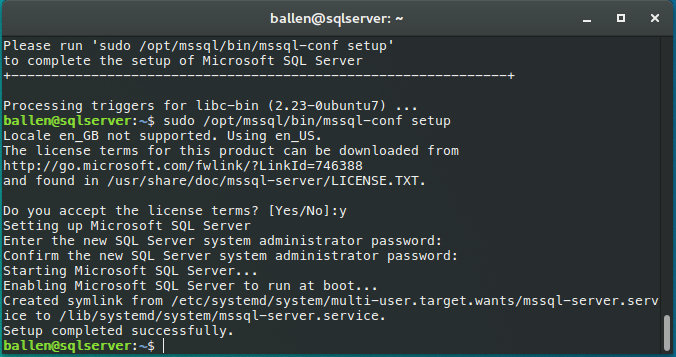
sudo /opt/mssql/bin/mssql-conf setup
You will now be asked to accept the terms (if you do, type Y and the press the return key), next you’ll be asked to set a password for the system administrator password (this will be the sa account), the password will need to be a complex one, if you don’t enter a strong enough password you’ll get an error message and need to re-run the above command to try again.
That’s it – Microsoft SQL Server is now running on your Ubuntu Linux server.
Before we can connect to it on our server we need to install the CLI tools… we will do this in the next step! – You can skip this step if you don’t require CLI access (or wish to do local backups)
Install SQL Server Agent
SQL Server agent enables the running of scheduled jobs on Microsoft SQL server, this is not installed out of the box and is totally optional, if you decide you want it installed you can do so as follows:
sudo apt-get install mssql-server-agent
For this to take affect we need to restart the MSSQL service service by executing:
sudo systemctl restart mssql-server.service
Great – That’s all done now! Let’s move on…
Installing Full-text search support
OK, so we now have Microsoft SQL server installed on our Ubuntu machine but, out of the box it doesn’t support full-text search, no sweat – we can add this using these commands:-
sudo apt-get install mssql-server-fts
Now restart the MSSQL service to enable the full-text search functionality…
sudo systemctl restart mssql-server.service
Simple right!
Installing the SQL Server CLI Tools
Like we did for the MSSQL server packages, we need to add another package repository before we can install the CLI tools.
Import the repository key and add the package repository like so:
curl https://packages.microsoft.com/config/ubuntu/16.04/prod.list | sudo tee /etc/apt/sources.list.d/msprod.list
Again, we now need to update our package sources:
sudo apt-get update
Then install the CLI tools package like so:
sudo apt-get install mssql-tools unixodbc-dev
We can now access and use the MSSQL CLI tools (sqlcmd – SQL CLI client and bcp – Backup CLI tool) under /opt/mssql-tools/bin/.
You may wish to add this directory to your user’s PATH alternatively you can symlink them (which I prefer to do) like so:-
sudo ln -sfn /opt/mssql-tools/bin/sqlcmd /usr/bin/sqlcmd
sudo ln -sfn /opt/mssql-tools/bin/bcp /usr/bin/bcp
Awesome! – That’s now installed and ready for us to use further down!
If you would like to test it out, try connecting like so:
sqlcmd -S localhost -U SA -P '<YourPasswordHere>'
Then you can attempt to query the list of databases like so:
SELECT Name from sys.Databases;
GO
To exit out of the sqlcmd tool type:
exit
…and press enter!
Configuring our firewall
If you’re not running a firewall on your server (eekk!!) you can skip this step!
Microsoft SQL Server requires TCP 1433 to be open on your firewall, if you are using IPTables you should add this to your configuration:
-A INPUT -p tcp --dport 1433 -j ACCEPT
UFW users can type this command:
sudo ufw allow 1433
You may wish to further lock down the allowed incoming IP address to only allow connections from your application server and/or office IP address.
Creating a new database
Firstly we need to connect to the server using the sqlcmd tool like so:
sqlcmd -S localhost -U SA -P '<YourPasswordHere>'
Once connected we can run the following statement to create a new database, in this example, we’ll create a database called “MyDatabase”:
CREATE DATABASE MyDatabase;
GO
Now leave the sqlcmd tool again by typing exit.
If you want to delete the database in future (but please leave it for now), you can run the following statement:
DROP MyDatabase;
GO
Creating a database user
Although at this point we are able to login using the sa account it is best that we configure our applications to connect using a dedicated account, using a dedicated account reduces the ability for any leaked account details to enable that account to access and potentially destroy/access all of the databases on our server.
sqlcmd -S localhost -U sa -P '<YourPasswordHere>'
We now need to select the database and then we can create the account and grant permissions like so:
USE MyDatabase;
GO
Next up, we create a server login:
CREATE LOGIN joebloggs WITH PASSWORD = '<NewUserPasswordHere>';
GO
We now create a database user that will be linked to the login name:
CREATE USER joebloggs FOR LOGIN joebloggs;
GO
We can now grant database “ALTER” permission to our new user:
GRANT ALTER TO joebloggs;
GO
And also, grant database “CONTROL” permission to the user
GRANT CONTROL TO joebloggs;
GO
Again, type exit and press return to leave the CLI tool.
Configuring database backups
I have knocked together a shell script that you can use in order to automatically backup all user databases on your server. The script connects to your SQL server and gets a list of all databases (minus the system ones) and then proceeds to do a “full backup” of each database.
The script can be found and downloaded here: https://gist.github.com/allebb/5d5f42db8ac78fc488ea25a0e5d4a051
If you wish to use this, lets download it and set it up now…
sudo curl https://gist.githubusercontent.com/allebb/5d5f42db8ac78fc488ea25a0e5d4a051/raw/f1e68c208eb81a30cc251fdcfa0f4258cf1b4aa7/mssqlbackup -o /usr/bin/mssqlbackup
sudo chmod +x /usr/bin/mssqlbackup
Lets see if it works, type the following command – We expect it to moan at this point (as we’re not passing any commands) and not set our backup directory!
mssqlbackup
By default the script will try to use /var/dbbackups but this is optional and will be set by the user when they call the script but for now, lets use this directory – we’ll create it now and give our mssql user access to it:
sudo mkdir /var/dbbackups
sudo chown mssql /var/dbbackups
sudo chmod -R 0740 /var/dbbackups
You can now attempt a database backup if you wish…
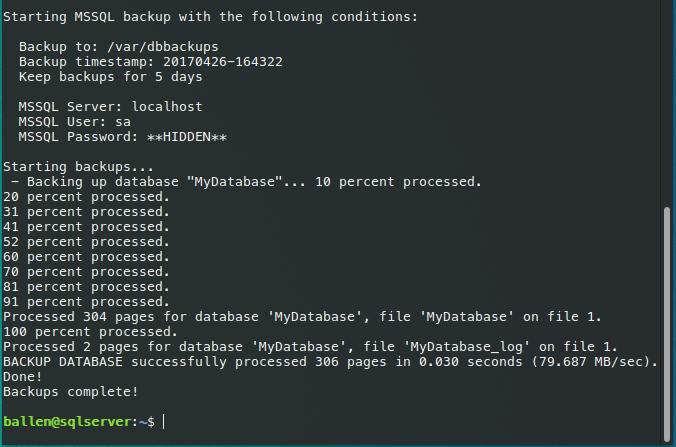
mssqlbackup "/var/dbbackups" 5 "localhost" "sa" "<YourPasswordHere>"
Running the above command (assuming you have created the example “MyDatabase”) should show something similar to:
Checking the directory contents (sudo ls -alh /var/dbbackups) should show a list of backups (assuming you have created some already!)
Lets now take this a step further – Using a cron job, we can setup automated these daily backups, so lets’ create a cron job to have all our databases backed up daily at 20:00:
sudo vi /etc/cron.d/mssql-backups
Now add the following content (replace with your password):
0 20 * * * root /usr/bin/mssqlbackup "/var/dbbackups" 30 "localhost" "sa" "<YourPasswordHere>"
Save the file and exit! – You should now start noticing automated nightly backups of all your databases – This command is set to automatically keep 30 days worth of backups too!
Managing our databases using Microsoft SQL Server Management Studio
If you have any client machines running Microsoft Windows, you can download SSMS (Sequel Server Management Studio) from the Microsoft website, installing and using that you can connect to your new database server, manage your databases and execute queries etc.
When running SSMS, you will need to enter your servers’ host name or IP address and login using SQL Server Authentication like so:

Keeping your server updated…
To update Microsoft SQL Server you should periodically download the latest package sources and update all of the components that you have installed; If you have installed everything (SQL Server, SQL Agent and the Full-text search functionality you should be running the following commands:-
sudo apt-get update
sudo apt-get install mssql-server
sudo apt-get install mssql-tools unixodbc-dev # Updates the SQL Server CLI tools
sudo apt-get install mssql-server-agent # Only run if you have installed the SQL Server Agent
sudo apt-get install mssql-server-fts # Only run if you have enabled the Full-text search functionality
After upgrading all of your packages it is recommended that you restart the Microsoft SQL server like so:
sudo systemctl restart mssql-server.service
I hope you found this blog post useful and I wish you all the best with running your Microsoft SQL databases on Linux!!
2 replies on “Installing Microsoft SQL Server on Ubuntu Server 16.04”
[…] You could also use Microsoft SQL Server if you wanted, you’d simply need to edit the appsettings.json file found in /var/webapps/lk2 and change the driver to mssql and set the corresponding connection string. You could also check out my recent blog post about installing and use Microsoft SQL Server on Linux. […]
[…] Installing Microsoft SQL Server on Ubuntu 16.04 I have written a post about this process last year but this was in Polish. You can still find it on Technet. You can find the English version of it on the Bobby Allen’s blog. […]