In this post, I will show you how to convert a computer power supply into a regular DC power supply with 12, 5 and 3.3 volt outputs.
Why use a computer (ATX) power supply? Well, they’re available everywhere, and they can output tremendous amounts of power in a small form factor. They have overload protection built right in, and even a 500W model can be reasonably priced with high efficiency. The voltage rails are incredibly stable. Giving nice, clean DC current even at high loads.
Why?
Well I’m in the process of building my new home cockpit (based on the Lockheed Martin F22), I need some additonal power for my simpit to enable me to power my OpenCockpits USB Outputs card and also to power some in-cockpit lighting (LED’s).
So, here we go…
The first order of business is that of safety. While I’m reasonably sure that there isn’t enough residual energy to stop your heart, those capacitors can still bite, and that can cause significant pain and maybe even burns. So be paranoid when getting close to the internal circuitry. It would probably be a good idea to put on some insulating gloves. Also (obviously) make sure the thing is unplugged. You are responsible for your own safety!
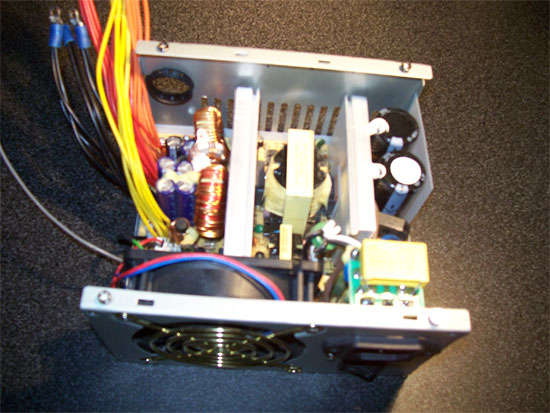
So firstly, open up the PSU…
Your PSU should look something like the above!
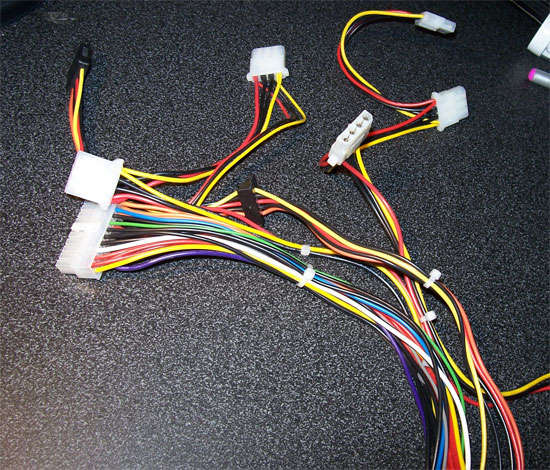
You will be met with the daunting task of sorting through a hundred wires of different colors. The only colors we care about are Black, Red, Orange, Yellow and Green. Any other colors are superfluous and you can cut them at the circuit board.
The green wire is what tells the power supply to turn on from stand-by mode, we want to just solder it to a ground (black) wire. Put some heat shrink on this so it won’t short out on anything else. This will tell the PSU to be constantly on without a computer.
The Purple, white and blue wires from the main connector are not needed and can be cut away, make sure that you insulate the cut-down cables to avoid any shortages and dangers of an electric shock!
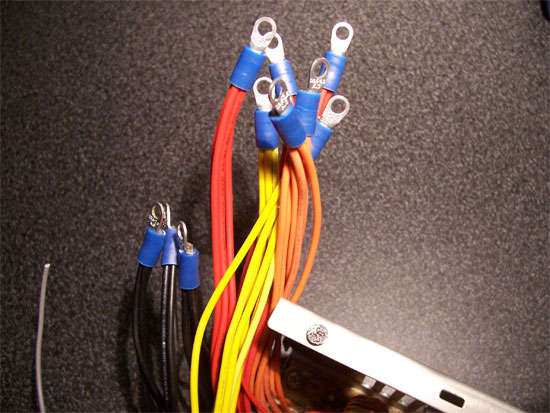
Cut all of the other wires down to about a foot, and remove any zip-ties. You should have a forest of wires with no connectors.
The colors represent:
YELLOW = 12 Volts
RED = 5 Volts
ORANGE = 3.3 Volts
BLACK = Common Ground.
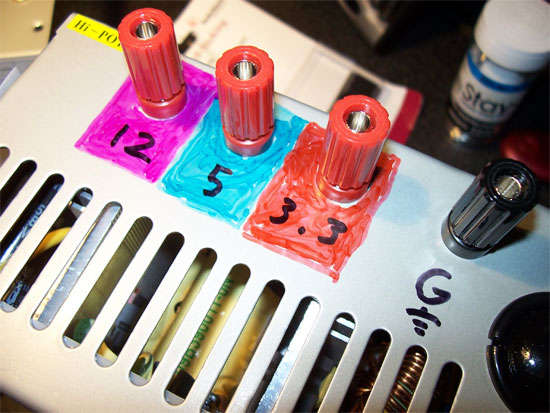
Now, theoretically, you could be done. Just hook the wires to 4 large alligator clips (one for each color set) or some other terminals.
Group the 4 wire colors together and cut them to length to where you marked where the posts would go. Use the wire strippers to take off the insulation and stick about 3-4 wires into one tongue terminal. Then crimp them. The exact number of wires per voltage rail depends on the wattage of the PSU. Mine was a 400W and there are about 9 wires per rail. You need all these wires so that you can get all of the current rated for that rail.
You can now either use the wires naked or if you want to add some extra cool stuff, check this out:-
Have fun!
Disclaimer: I didn’t actually create this tutorial, I read it from this site, I’m simply hosting the content on my site too to ensure that data is never lost in the event that the above site is ever taken offline!


