
Oh-My-ZSH makes your terminal look and feel awesome – I used it daily on my MacOSX machines and also on Linux desktops in the past too!
I’ve recently switched my Apple MacBook Pro over to a Dell XPS and am now using Windows as my daily driver. More information on the move can be found in an earlier blog post.
I’ve put this quick tutorial together to demonstrate how you can run Oh-My-ZSH and have a really awesome Linux terminal on Windows (knowing that others will be switching back to soon Windows too ;))…
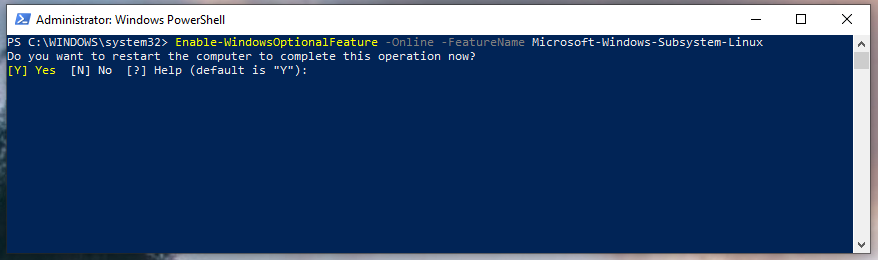
First of all, we need to enable WSL (Windows Sub-system for Linux), we can do this by opening PowerShell as Administator and then running the following command:
Enable-WindowsOptionalFeature -Online -FeatureName Microsoft-Windows-Subsystem-LinuxIt should look something like so:
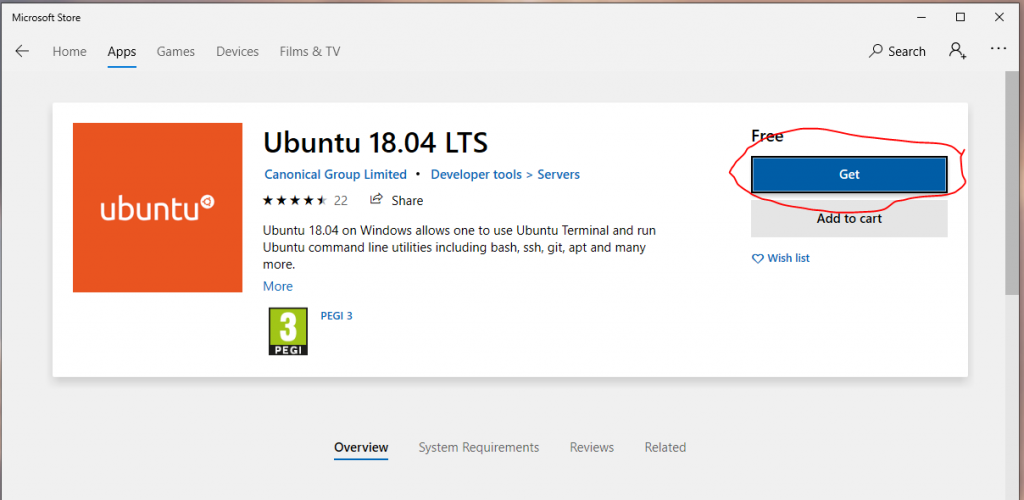
Once completed, Windows will require you to reboot your machine, at the prompt (shown above, type Y and press the return key (aka the “Enter” key), once logged back in we’ll open up the Microsoft Store and find “Ubuntu 18.04” and then install it by clicking the blue Get button:
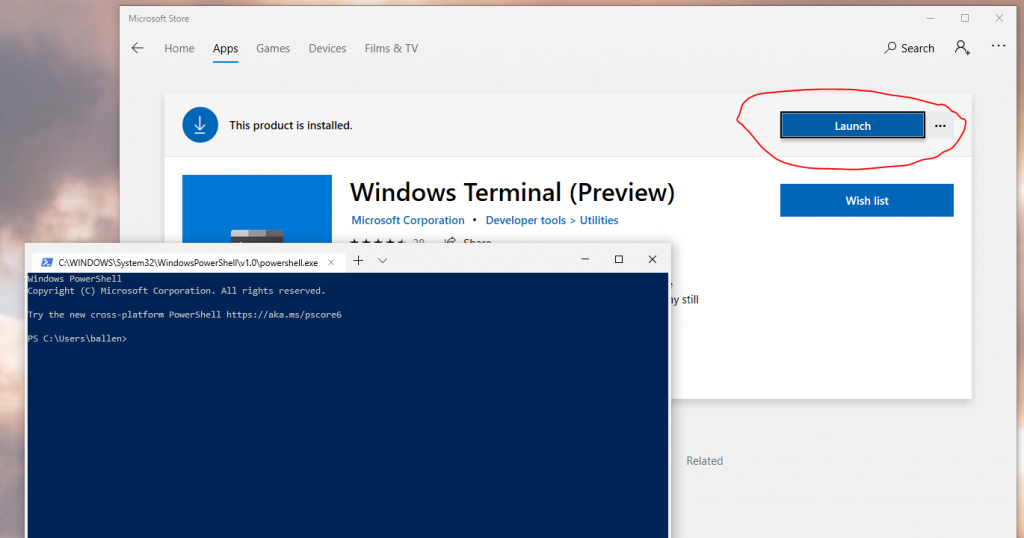
Once installed we will now go and install “Windows Terminal”, this is a new terminal developed by Microsoft that supports a whole host of goodness and makes this feel more like iTerm and other modern day terminal applications, using the Windows Store search box, search for “Windows Terminal” and install that too:
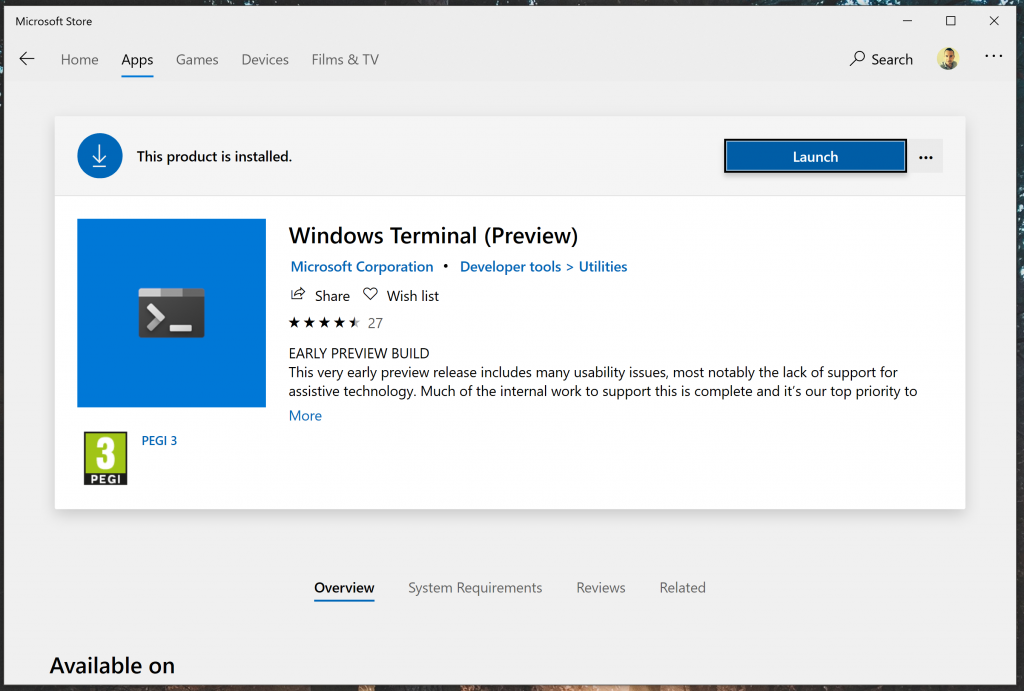
Great stuff, once the Windows Terminal is installed, you’ll see the Launch button, click this to open the newly installed Windows Terminal, it should appear as follows:
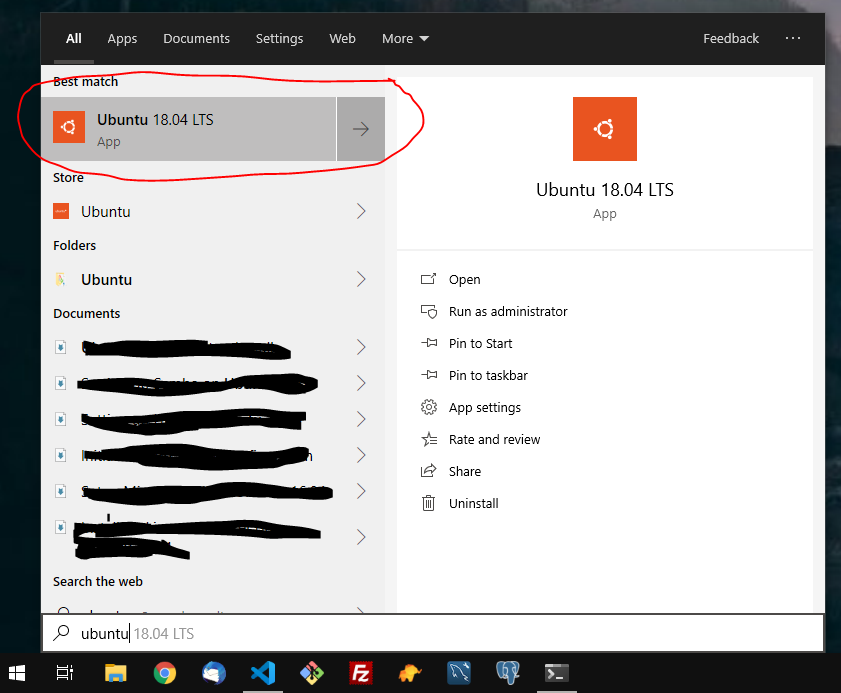
The next step is for us to initiate our WSL distrubution, to do this, open up the Start Menu and type (or find in the Programs List) “Ubuntu”, you should see it appear like so:
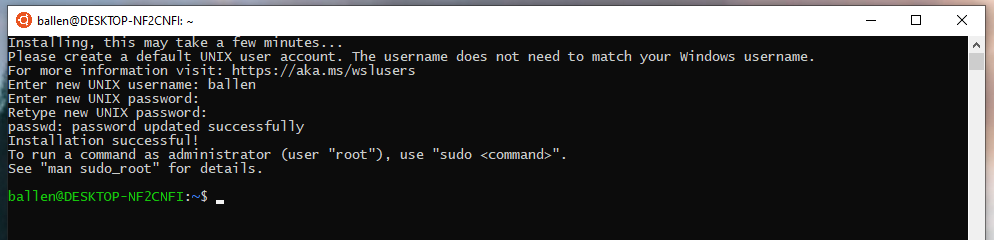
Click the icon to open up the default Ubuntu 18.04 terminal window, as this is the first time it has been run, it’ll first install some files that are required and you will then be prompted for a UNIX username – This account does not have to be the same as your windows login but I would recommend ensuring that it’s lowercase and only contain standard characters.

Once you have set a username and password you will then be presented with the standard BASH terminal like so:
Although we used the default “Ubuntu Logo” icon to open up our Linux terminal for the first time, going forwards we will access this from the Windows Terminal application instead (as it supports all the modern features of a Terminal client).
You can now close this window and we’ll move on the Windows Terminal configuration…
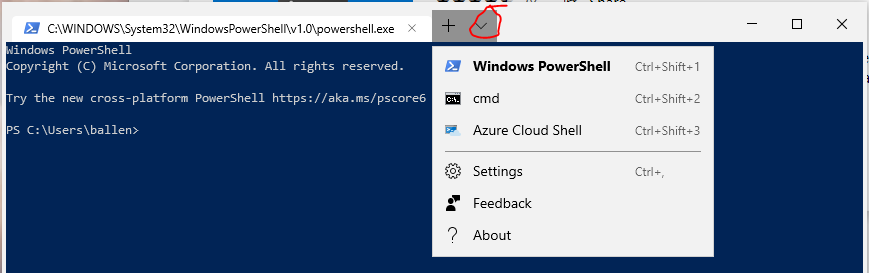
Now that we have the Windows Terminal open, we can see that it opens Powershell by default, you can open new tabs (which can be different shells, by default, Windows Terminal Preview as the time of writing includes PowerShell (the default), the standard Windows Command Prompt (cmd) and the Azure Cloud Shell.
As you’ve probably noticed, at this point we don’t yet have the Ubuntu Shell (bash) setup, we will move on to that next…
From the dropdown menu (shown in the screenshot above), click on the Settings option. The Windows Terminal settings are stored in JSON format, clicking the Settings option from the menu will open up your default text editor (in my case, I use Visual Studio code, the file looks as follows):
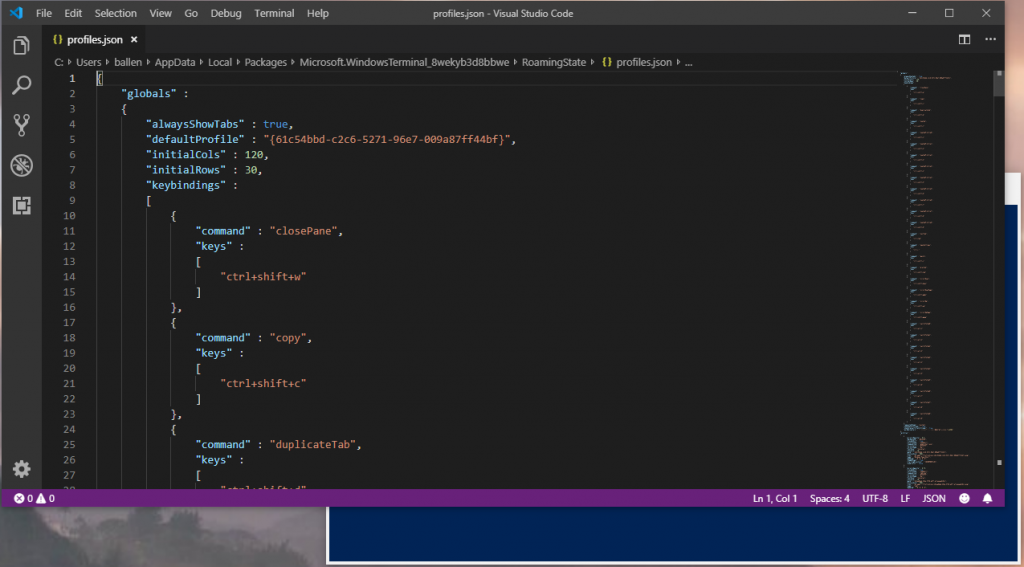
It’s worth noting that simply saving this file will automatically update your Windows Terminal configuration (settings are made on the fly when you save changes to this configuration file).
We are now going to add a new profile to our Windows Terminal settings file, to do this scroll down this file until you find the “profile” section, we we now paste the following JSON block into the file:
     {
            "acrylicOpacity" : 0.75,
            "closeOnExit" : true,
            "colorScheme" : "Bobstar",
            "commandline" : "wsl.exe -d Ubuntu-18.04",
            "cursorColor" : "#FFFFFF",
            "cursorShape" : "bar",
            "fontFace" : "Source Code Pro For Powerline",
            "fontSize" : 10,
            "guid" : "{9caa0dad-35be-5f56-a8ff-afceeeaa6101}",
            "historySize" : 9001,
            "icon" : "ms-appx:///ProfileIcons/{9acb9455-ca41-5af7-950f-6bca1bc9722f}.png",
            "name" : "Ubuntu",
            "padding" : "5, 5, 5, 5",
            "snapOnInput" : true,
            "startingDirectory" : "%USERPROFILE%",
            "useAcrylic" : false
        }
This profile is tells Microsoft Terminal to create a new item on to the terminal dropdown menu, the above code block’s commandline value is set to open up our WSL container named “Ubuntu-18.04“. If you want to check what other WSL containers you have running on your computer you can run wsl -l which will then output the list of WSL distrubutions you have installed from the Microsoft Store.
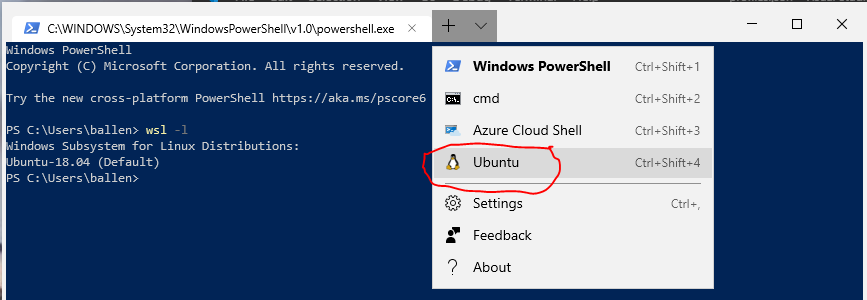
Saving the file at this point will now add the “Ubuntu” option onto your terminal dropdown menu as demonstrated here:
Before opening “Ubuntu” we need to do a few more things given that the profile configuation you copied in a few moments ago is customised and requires some additional fonts to be installed on your PC first.
Now download the free Source Code Pro for Powerline font and install from GitHub. You can also download it here if navigating GitHub is not something you really want to do.
Next up, back in the settings file (the JSON file), locate the “schemes” section and paste the following scheme in:
      {
            "background" : "#2B313A",
            "black" : "#0C0C0C",
            "blue" : "#406BA4",
            "brightBlack" : "#767676",
            "brightBlue" : "#7C9FD1",
            "brightCyan" : "#61D6D6",
            "brightGreen" : "#6D4344",
            "brightPurple" : "#B4009E",
            "brightRed" : "#96BAC9",
            "brightWhite" : "#F2F2F2",
            "brightYellow" : "#F9F1A5",
            "cyan" : "#3A96DD",
            "foreground" : "#B1C0B4",
            "green" : "#FFFFFF",
            "name" : "Bobstar",
            "purple" : "#881798",
            "red" : "#7B5761",
            "white" : "#CCCCCC",
            "yellow" : "#8DA76E"
        },
Next, I personally like to set “Ubuntu” as my default terminal you locate this section:
"defaultProfile" : "{61c54bbd-c2c6-5271-96e7-009a87ff44bf}",and change to:
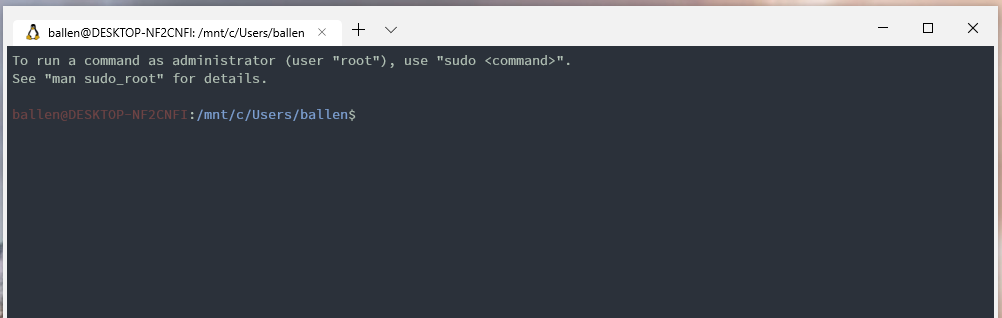
"defaultProfile" : "{9caa0dad-35be-5f56-a8ff-afceeeaa6101}",Great – Now close the Windows Terminal application and re-open it – You should notice that you are now presented with the Ubuntu shell instead (by default) and should look something like this:
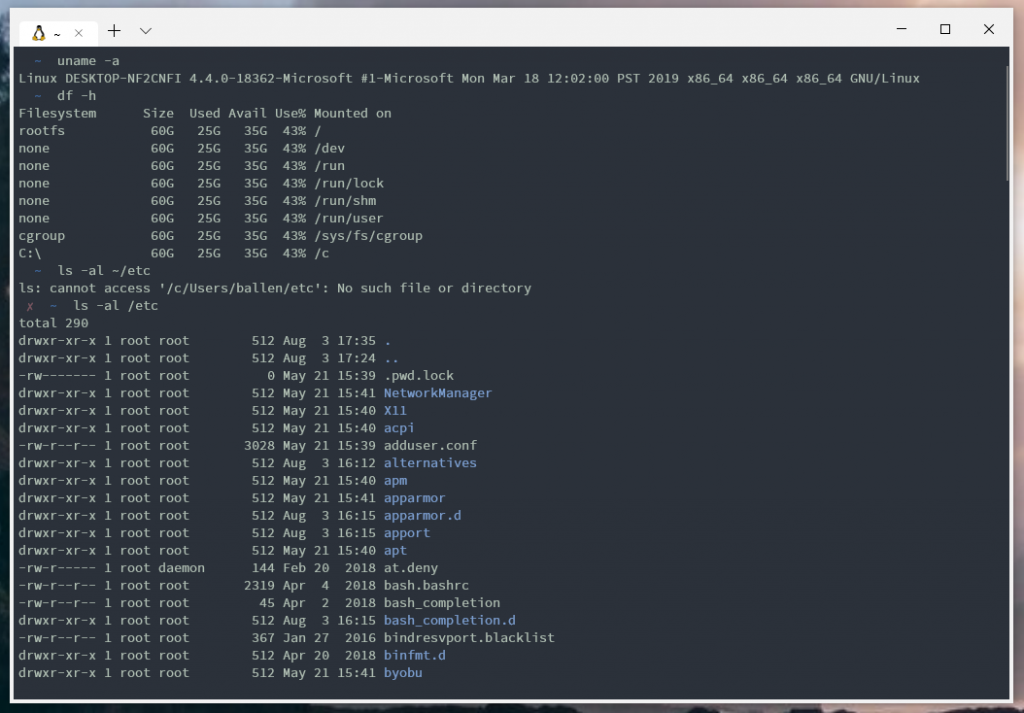
The next step we want to do is to update our default home directory that Ubuntu uses, instead of /home/{user} we’ll instead change it so our Linux home directory is mapped to our Windows home directory (C:\Users\{username}).
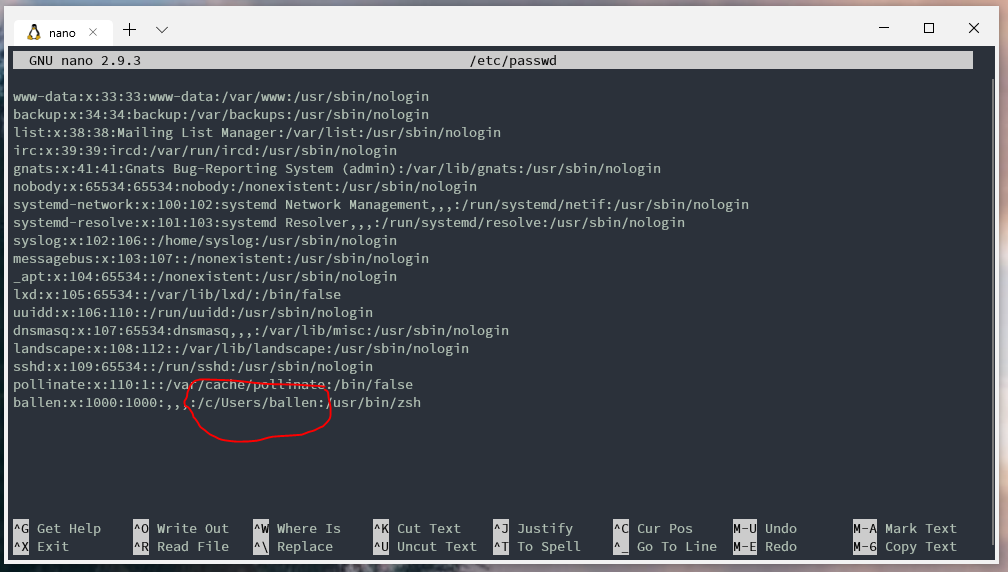
WSL mounts Windows drive letters under /mnt/{drive letter} by default, we will however change this in the wsl.conf in a few steps (we set the root to be ‘/’ instead), so we know that we therefore need to update our home directory from /home/{username} to /c/Users/{username}, we do this by editing the /etc/passwd file:
sudo nano /etc/passwd
Now, scroll to the bottom of this file, you should see you Linux username as the last entry, update the home path section to match as the above, this screenshot demonstrates what it should be (my username is ballen in this example, you’ll need to replace that with your own ;))
A vital step (to ensure Linux permissions are translated properly for SSH key permissions etc. We must now create a new file (/etc/wsl.conf) and add some settings, we can do this like so:
sudo nano /etc/wsl.conf
Add the following contents into this file and then save and exit!
[automount]
enabled = true
root = /
options = "metadata,umask=22,fmask=11"
At this point, I’d recommend that you close all Microsoft Terminal windows and then run the following command from a standard command prompt window, this will ensure that WSL is terminated properly as the wsl.conf file is re-ready when the light-weight Linux container is restarted:
wsl.exe --terminate Ubuntu-18.04Let’s now take a minute to recap…
At this point we have WSL installed, Ubuntu 18.04 LTS and the Windows Terminal installed and configured with a custom theme and updated the configuration to set our default terminal tab to open BASH (through our Ubuntu 18.04 LTS Linux distribution).
We will now move on to updating our Ubuntu 18.04 environment and install and configure Oh-My-ZSH.
Lets now update Ubuntu:
sudo apt-get update
sudo apt-get upgrade
Next we’ll install ZSH:
sudo apt-get install zshNow we’ll install Oh-My-ZSH using the following command:
sh -c "$(curl -fsSL https://raw.githubusercontent.com/robbyrussell/oh-my-zsh/master/tools/install.sh)"When prompted to “Would you like to change your default shell”, type Y and press the return key (ENTER):
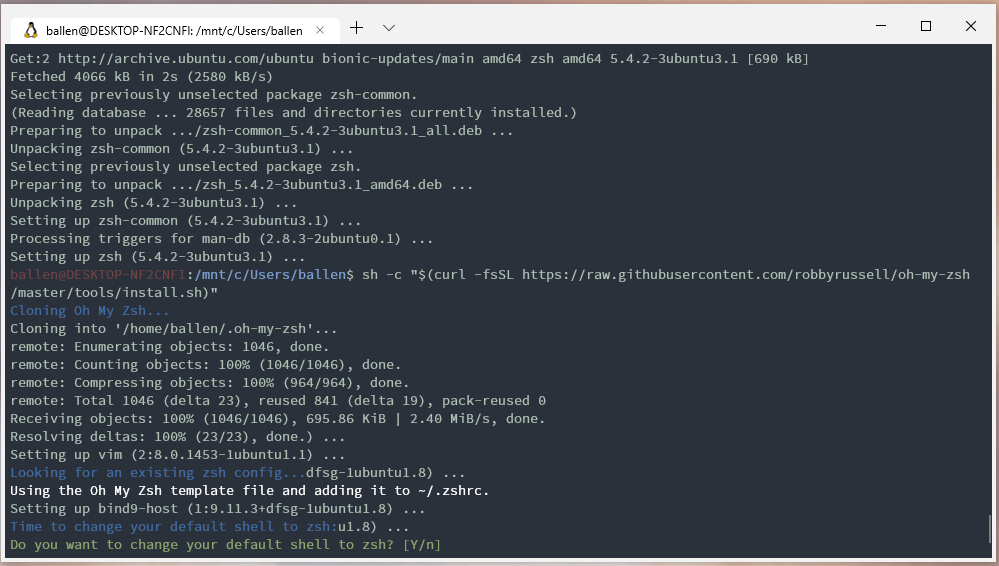
Once the installation is completed, close the terminal.
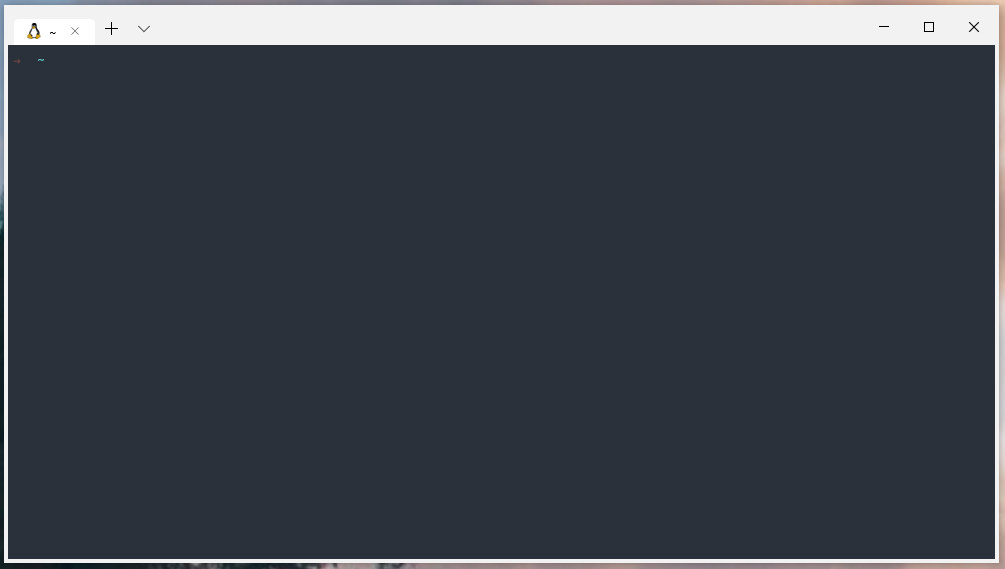
We’ll now test that Oh-My-ZSH is configured to start up when we open our terminal, open up the Windows Terminal from the start menu and you should now be looking at the default Oh-My-ZSH theme like so:
Next up you will need to download my custom ZSH theme.
Extract the file named bobstar.zsh-theme (from the downloaded ZIP file) and copy this to the following location:
C:\Users\{username}\.oh-my-zsh\themes
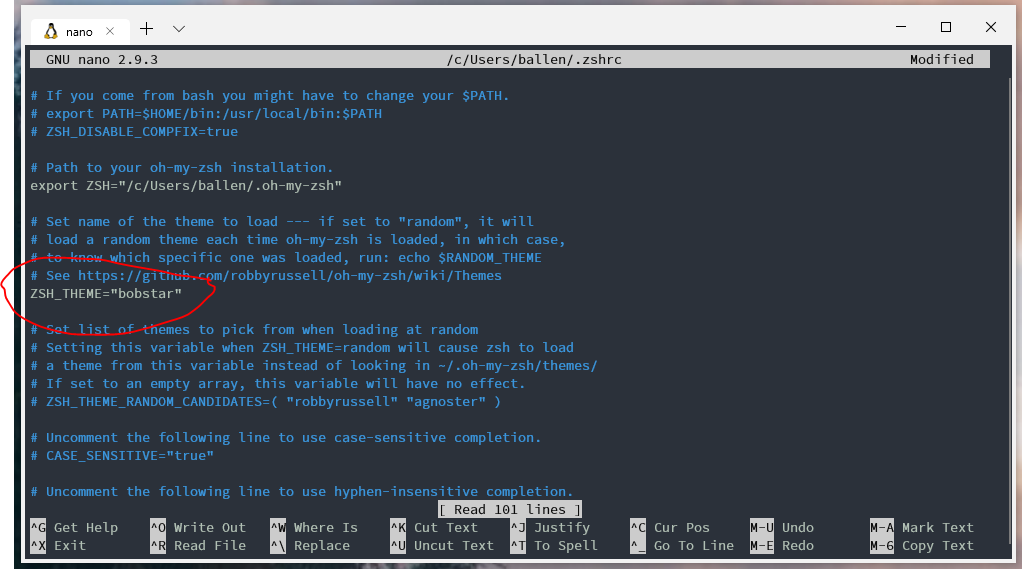
We can now go and enable this theme to do this, back in the Windows Terminal type the following command:
sudo nano ~/.zshrcWe will update the Oh-My-ZSH theme from the default robbierussel theme to our new bobstar theme, update the value in this file as shown here:
Now save the file and exit the file editor.
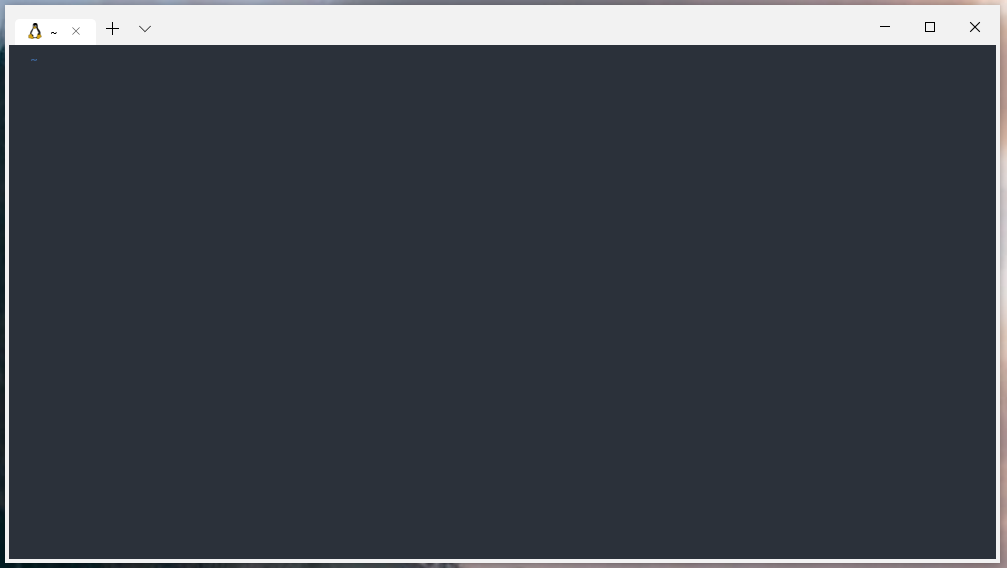
It’s now time to test it all out… Close your terminal and re-open it!
All going we’ll it should now look a little like this…
Tip: Once you change your home directory to match your Windows home directory path, you should set the Linux Ownerhsip settings correctly, this can be achieved by running the following command (assuming your Linux username is the same as your Windows username):
sudo chown -R $USER:$USER /c/Users/$USER