
In my opinion, Mattermost is the perfect self-hosted, open-source alternative to Slack and Microsoft Teams.
As a software engineer, and like most people I’ve used a variety of messaging platforms (Slack, Discord and Microsoft Teams) to communicate with team members, share, discuss and store ideas but more importantly as part of my DevOps workflow – I have built and integrated “ChatBots” to automate all kinds of things such as deployments, taking backups, getting system stats and even rebooting systems and services remotely (otherwise known as “ChatOps”).
So why not just use Slack or Discord? After all they’re free and won’t cost you anything in the short term. Well, if you favour privacy and want to feel safe in the knowledge that your data is in your own control then I’d recommend you look at switching over to Mattermost and is certainly the reason why I personally have decided to migrate away from Slack and other messaging platforms in favour of setting up and using Mattermost for my side projects and when working on projects with my friends.
….what’s even better is that Mattermost has a built in migration system that will migrate your Slack server automatically for you and Mattermost’s webhook integrations are fully backward compatible with Slack meaning that any bots you have used in the past or system integrations that use the “Incoming Webhooks” or “Outgoing Webhooks” should simply continue to work, you’d just need to update your URLs.
In this post I will walk you through the installation of Mattermost (Community Edition) on a fresh Ubuntu 18.04 Server, we will use DigitalOcean to provision and host our VM the end result will give you a slack-compatible messaging system where you control who has access to your data!
Creating our virtual server
As mentioned above we’ll be using DigitalOcean to create and host our server. DigitalOcean offer super competitively priced virtual machine hosting.
First of all, create an account on DigitalOcean if you don’t already have one use this link (you’ll get $100 free credit to use) when you sign-up with DigtialOcean this essentially gives you the ability to run this server for several months before having to pay a penny (cent etc.) to DigitalOcean!
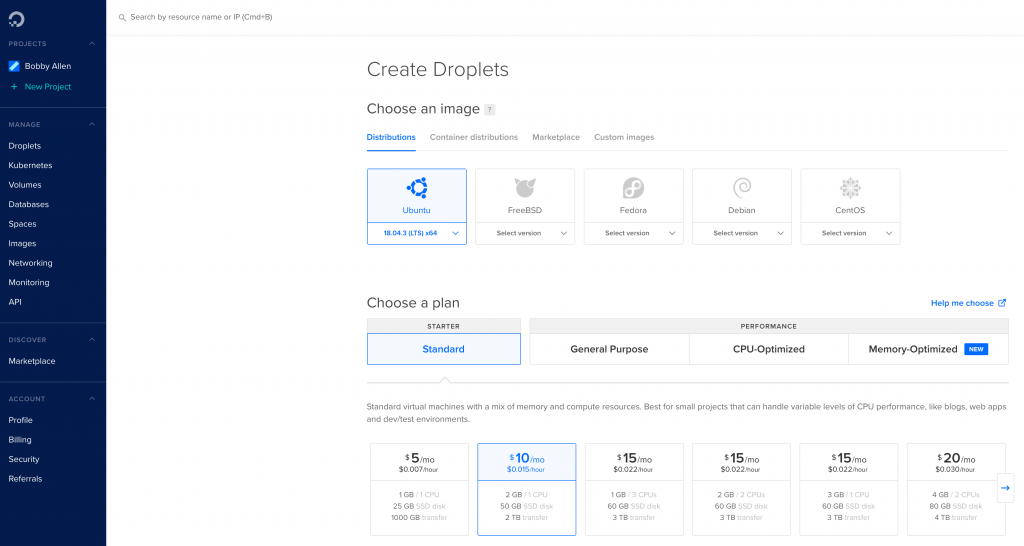
Once you have your DigitalOcean account, login and click on “Droplets” from the left-hand navigation menu, then click “Create new droplet“.
On the Droplet creation screen, select “Ubuntu Server 18.04.x (LTS) x64” from the Distrubutions selection, under the “Choose a plan” section, select “Standard” and then choose the $10/mo instance.
Scrolling down…. Select a datacenter region near you – as per the below screenshot I choose “London“, then under the “Authentication” section, you can choose SSH keys or One-time password, for this tutorial, I choose “One-time password” for simplicity sake.

We’re pretty much done now, you can now choose a hostname for the virtual machine (we can change it later anyways), so lets get the show on the road… just click “Create Droplet“.
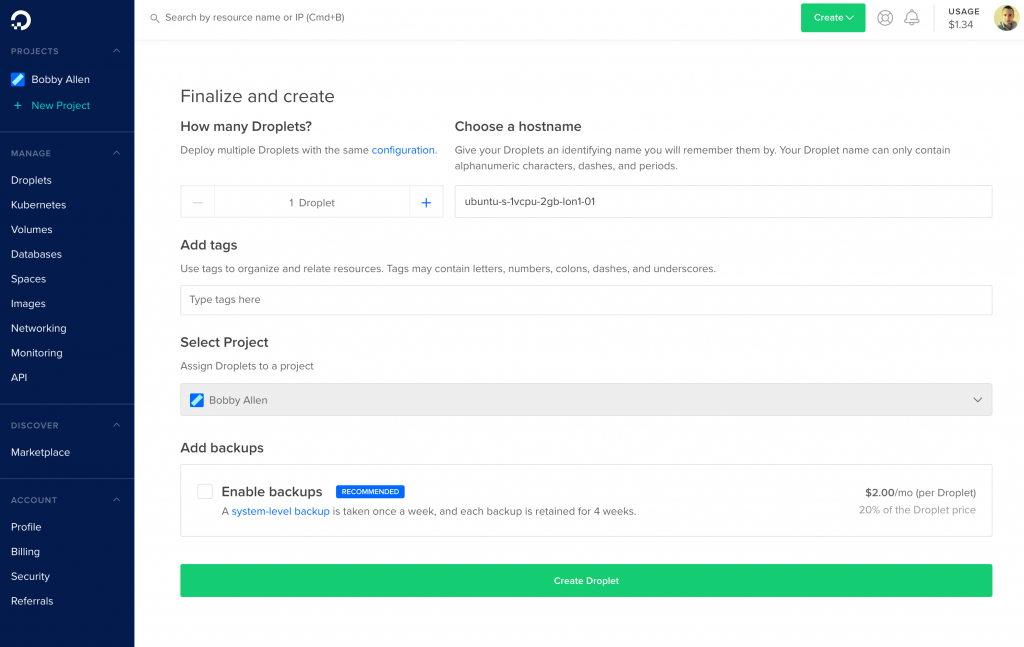
The virtual machine will now be created…
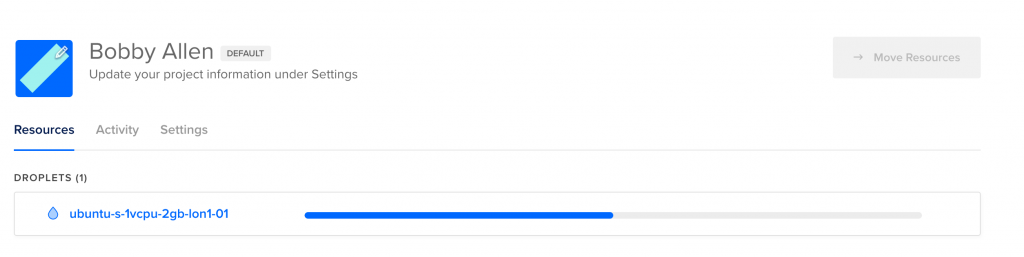
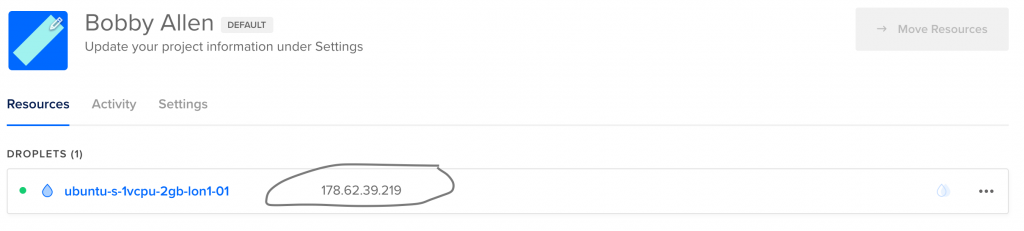
Once the creation process is completed, the IP address will now be visible, make a note of it now…
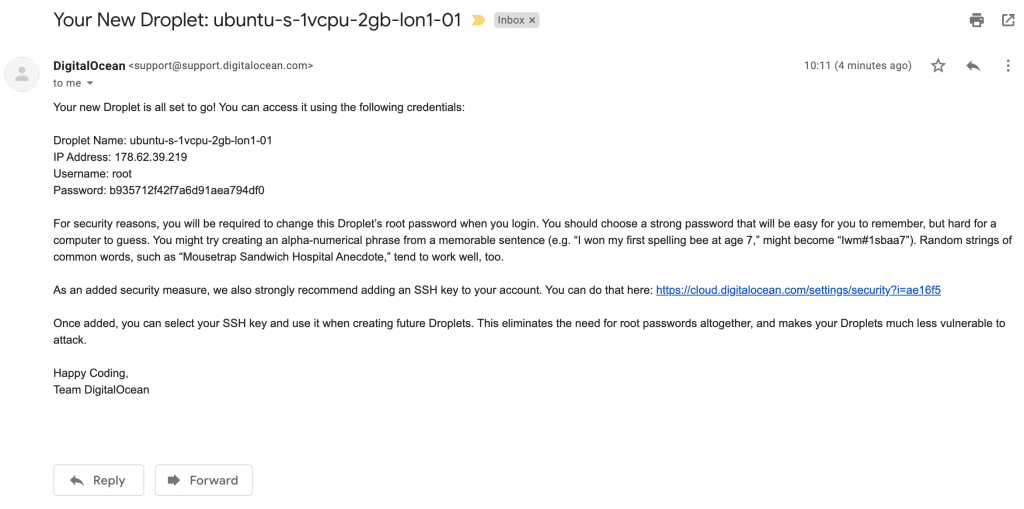
The next bit we need is the randomly generated root account password, for this you’ll need to login to your email and you should have recieved an email from DigitalOcean like so:
Now we have all the details that we need to access our server, we can now close our browser and move on to SSH’ing into our newly provisioned server and start installing the software…
Installing Mattermost
Let’s now SSH into our server like so:
ssh root@{your-server-ip}
Once logged in you’ll be prompted to reset your password, you’ll need to do this first and then log back in using your newly configured password.
Now that you’re logged in with your new password, we can move on!
First thing it first – we need to update our packages and apply all updates, we do this like so:
sudo apt-get update -y && sudo apt-get upgrade -y
We will now install MySQL server as this is used for peristent storage by Mattermost, we can do this by running the following commands:
sudo apt-get install mysql-server
mysql_secure_installation
Now that MySQL is installed and running, we will now create a MySQL database (mattermost) and dedicated user account (mmapp) that Mattermost will use to connect to the database with, first we need to gain access to the MySQL CLI like so:
sudo mysql
Now run the following commands in the MySQL CLI (ensure you set your own password below (by replacing yourRandomPasswordHere):
CREATE USER 'mmapp'@'%' IDENTIFIED BY 'yourRandomPasswordHere';
CREATE DATABASE mattermost;
GRANT ALTER, CREATE, DELETE, DROP, INDEX, INSERT, SELECT, UPDATE ON mattermost.* TO 'mmapp'@'%';
EXIT
With the database side of things sorted out, we can now install the Mattermost software…
We will now download the latest tar.gz package from the Mattermost website, at the time of writing this is version 5.19.1. However you should check for the latest version on their website here (when the page loads, ensure you select “OpenSource Team Edition (MIT License)”) and adjust the filename below (if applicable).
wget https://releases.mattermost.com/5.19.1/mattermost-team-5.19.1-linux-amd64.tar.gz
We can now extract the archive, move the files to a suitable location and create a data directory which will be used for storing file uploads, we will do this by running the following commands:
tar -xvzf mattermost*.gz
sudo mv mattermost /opt
sudo mkdir /opt/mattermost/data
It’s best practice to create a system user at this point, this user will be used to run the daemon, execute the following commands to create our new system user, and set the appropriate permissions on our mattermost application directories:
sudo useradd --system --user-group mattermost
sudo chown -R mattermost:mattermost /opt/mattermost
sudo chmod -R g+w /opt/mattermost
Next up we need to configure the Mattermost config.json file, this essentially involves configuring our database connection paramaters and a few other bits. Lets now open the file:
sudo vi /opt/mattermost/config/config.json
I will now locate and update the following settings – you will need to do the same but ensure you replace your own domain inplace of my example domain:
"SiteURL": "https://mattermost.bobbyallen.me"
"DriverName": "mysql"
"DataSource": "mmapp:yourRandomPasswordHere@tcp(127.0.0.1:3306)/mattermost?charset=utf8mb4,utf8\u0026readTimeout=30s\u0026writeTimeout=30s"
Once you’ve made those changes, save the file and exit.
We can now check if Mattermost will start, to do this we will run the following commands:
cd /opt/mattermost
sudo -u mattermost ./bin/mattermost
The server should now start and will prepare the database (on first load), it will take a few seconds but once you see this line in the terminal:
{"level":"info","ts":1581073003.819339,"caller":"app/server.go:506","msg":"Server is listening on [::]:8065"}
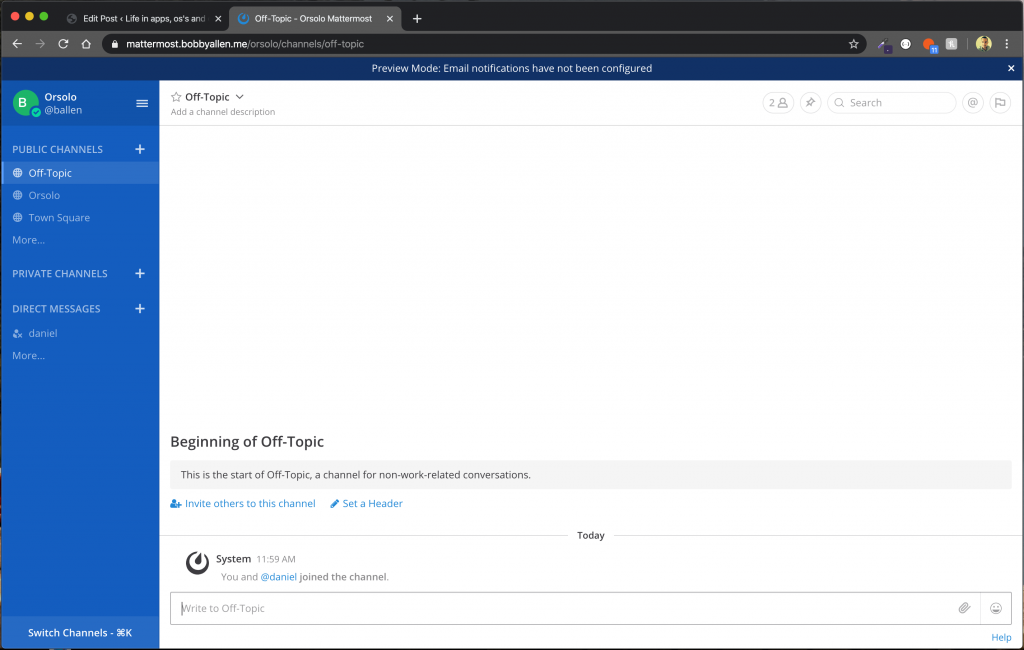
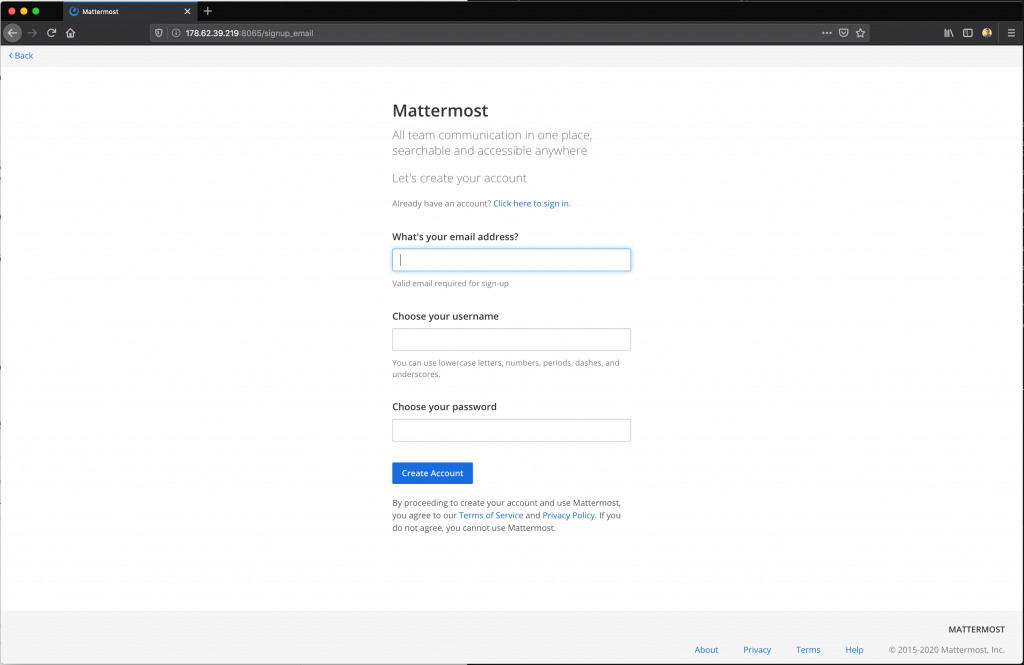
You can now open up a web browser and enter the following URL into your browser: http://{your-server-ip}:8065, assuming all went well you should now see this page:
Now we know that the software is running and our database configuration is therefore correct we can now kill the Mattermost process in the terminal by pressing CTRL+C.
Configure Mattermost as a system daemon and have it auto-start at boot
We don’t want to manually run the Mattermost process each time, it’s not practical and it’s not best practice.
We will instead create a systemd file and configure Mattermost to start up at system boot in the background (essentially creating a system service if you’re from a Microsoft Windows background, in the word of UNIX/Linux this is known as a daemon!).
We’ll create the systemd file like so:
sudo vi /lib/systemd/system/mattermost.service
…and paste in the following content:
[Unit]
Description=Mattermost
After=network.target
After=mysql.service
Requires=mysql.service

[Service]
Type=notify
ExecStart=/opt/mattermost/bin/mattermost
TimeoutStartSec=3600
Restart=always
RestartSec=10
WorkingDirectory=/opt/mattermost
User=mattermost
Group=mattermost
LimitNOFILE=49152

[Install]
WantedBy=mysql.service
We’ll now start the service and ensure that it is configured to auto-start when our server reboots:
sudo systemctl daemon-reload # Detect our new systemd script.
sudo systemctl status mattermost.service # Check that it has been detected!!
sudo systemctl start mattermost.service # Start the service
sudo systemctl enable mattermost.service # Configure our service to start automatically in future.
Now you should be able to access the installation splash screen again by using your browser and navigating to: http://{your-server-ip}:8065
Setup Nginx Proxy
Whilst we could update our configuration file for Mattermost and change listening ports etc. It’s common practice to use a web server such as Nginx to proxy requests to the backend Mattermost service.
We will install Nginx like so:
sudo apt-get install nginx -y
Let’s now configure Nginx to proxy requests to Mattermost:
sudo vi /etc/nginx/sites-available/mattermost
Now paste the following into this file (updating instances of my domain with your own):
upstream backend {
   server 127.0.0.1:8065;
   keepalive 32;
}

proxy_cache_path /var/cache/nginx levels=1:2 keys_zone=mattermost_cache:10m max_size=1g inactive=120m use_temp_path=off;

server {
   listen 80;
   server_name    mattermost.bobbyallen.me;

   location ~ /api/v[0-9]+/(users/)?websocket$ {
       proxy_set_header Upgrade $http_upgrade;
       proxy_set_header Connection "upgrade";
       client_max_body_size 50M;
       proxy_set_header Host $http_host;
       proxy_set_header X-Real-IP $remote_addr;
       proxy_set_header X-Forwarded-For $proxy_add_x_forwarded_for;
       proxy_set_header X-Forwarded-Proto $scheme;
       proxy_set_header X-Frame-Options SAMEORIGIN;
       proxy_buffers 256 16k;
       proxy_buffer_size 16k;
       client_body_timeout 60;
       send_timeout 300;
       lingering_timeout 5;
       proxy_connect_timeout 90;
       proxy_send_timeout 300;
       proxy_read_timeout 90s;
       proxy_pass http://backend;
   }

   location / {
       client_max_body_size 50M;
       proxy_set_header Connection "";
       proxy_set_header Host $http_host;
       proxy_set_header X-Real-IP $remote_addr;
       proxy_set_header X-Forwarded-For $proxy_add_x_forwarded_for;
       proxy_set_header X-Forwarded-Proto $scheme;
       proxy_set_header X-Frame-Options SAMEORIGIN;
       proxy_buffers 256 16k;
       proxy_buffer_size 16k;
       proxy_read_timeout 600s;
       proxy_cache mattermost_cache;
       proxy_cache_revalidate on;
       proxy_cache_min_uses 2;
       proxy_cache_use_stale timeout;
       proxy_cache_lock on;
       proxy_http_version 1.1;
       proxy_pass http://backend;
   }
}
Now that we have our new Nginx proxy virtualhost configuration added, we should disable the default Nginx configuration and enable our new proxy configuration by symlinking it to the site-enabled directory like so:
sudo rm /etc/nginx/sites-enabled/default
sudo ln -s /etc/nginx/sites-available/mattermost /etc/nginx/sites-enabled/mattermost
Let’s test and restart Nginx:
sudo nginx -t
sudo systemctl restart nginx
Test that we can now access Mattermost through our Nginx proxy:
http://{your-server-ip}}
Now that we have that working lets now install CertBot (aka. LetsEncrypt) and setup a free SSL certificate and then reconfgure Nginx to use this SSL certificate (we will configure it to use what is known as SSL termination at the proxy).
Setup CertBot and secure our Mattermost instance
We’ll now install CertBot, this will enable us to request and renew LetsEncrypt SSL certificates, we can do this like so:
sudo wget https://dl.eff.org/certbot-auto
sudo mv certbot-auto /usr/sbin/certbot-auto
sudo chmod a+x /usr/sbin/certbot-auto
Lets also add the following to our crontab too, this will ensure that our SSL certificates are automatically renewed:
crontab -e
Add the following line:
0 2 * * * sudo /usr/sbin/certbot-auto -q renew
Let’s now request a new SSL certificate for our domain:
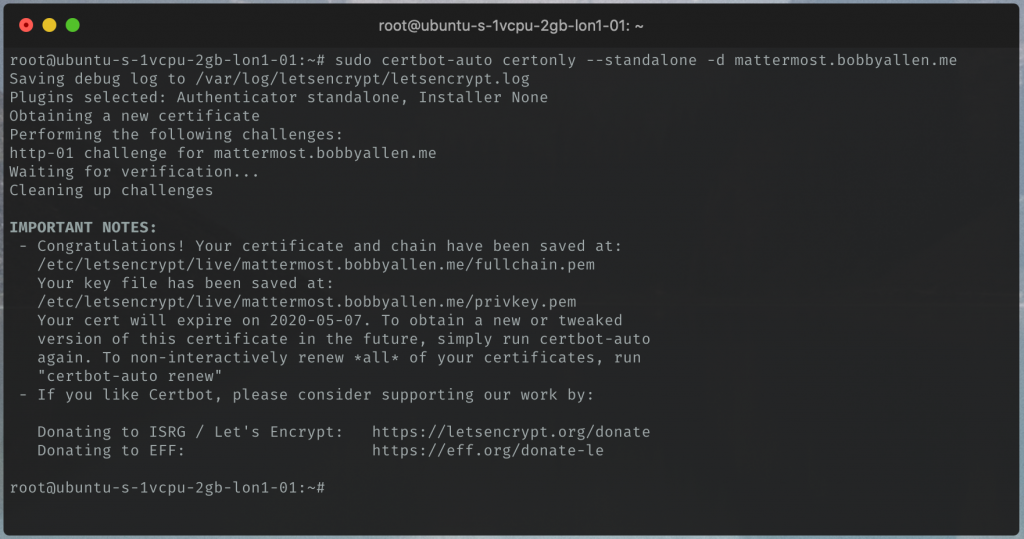
sudo systemctl stop nginx # We must stop Nginx first as domain verification attempts to bind to port 80!
sudo certbot-auto certonly --standalone -d mattermost.bobbyallen.me
If you are prompted at this point to install some packages, confirm by pressing Y and ENTER.
Be sure to have your domain(s) configured in DNS and confirm that they are pointing to your server’s IP address (LetsEncrypt needs this for validation purposes).
Assuming all went well you should see the congratulations screen as follows:
Now, using the new certificates we can now go back and configure Nginx to serve Mattermost over SSL only (much more secure!)
Configure Nginx to serve over SSL only
We now just need to add a few more lines of configuration to our Nginx configuration file and a few minor tweaks (disable HTTP access on port 80).
Let’s edit our Nginx site configuration file again by opening the file:
sudo vi /etc/nginx/sites-available/mattermost
Adjust the file so it now looks as follows (remember to ensure that you replace all instances of mattermost.bobbyallen.me with your own domain!)
upstream backend {
   server 127.0.0.1:8065;
   keepalive 32;
}

proxy_cache_path /var/cache/nginx levels=1:2 keys_zone=mattermost_cache:10m max_size=1g inactive=120m use_temp_path=off;

server {
    listen 80;
    server_name mattermost.bobbyallen.me;
    return 301 https://$server_name$request_uri;
}

server {
   #listen 80;
   listen 443 ssl http2;

   server_name mattermost.bobbyallen.me;

   ssl on;
   ssl_certificate /etc/letsencrypt/live/mattermost.bobbyallen.me/fullchain.pem;
   ssl_certificate_key /etc/letsencrypt/live/mattermost.bobbyallen.me/privkey.pem;
   ssl_session_timeout 1d;
   ssl_protocols TLSv1.2;
   ssl_ciphers 'ECDHE-ECDSA-AES256-GCM-SHA384:ECDHE-RSA-AES256-GCM-SHA384:ECDHE-ECDSA-CHACHA20-POLY1305:ECDHE-RSA-CHACHA20-POLY1305:ECDHE-ECDSA-AES128-GCM-SHA256:ECDHE-RSA-AES128-GCM-SHA256:ECDHE-ECDSA-AES256-SHA384:ECDHE-RSA-AES256-SHA384:ECDHE-ECDSA-AES128-SHA256:ECDHE-RSA-AES128-SHA256';
   ssl_prefer_server_ciphers on;
   ssl_session_cache shared:SSL:50m;

   # HSTS (ngx_http_headers_module is required) (15768000 seconds = 6 months) - Recommended you enable this by Google and understand what HSTS is first!
   #add_header Strict-Transport-Security max-age=15768000;
   # OCSP Stapling ---
   # fetch OCSP records from URL in ssl_certificate and cache them
   ssl_stapling on;
   ssl_stapling_verify on;

   location ~ /api/v[0-9]+/(users/)?websocket$ {
       proxy_set_header Upgrade $http_upgrade;
       proxy_set_header Connection "upgrade";
       client_max_body_size 50M;
       proxy_set_header Host $http_host;
       proxy_set_header X-Real-IP $remote_addr;
       proxy_set_header X-Forwarded-For $proxy_add_x_forwarded_for;
       proxy_set_header X-Forwarded-Proto $scheme;
       proxy_set_header X-Frame-Options SAMEORIGIN;
       proxy_buffers 256 16k;
       proxy_buffer_size 16k;
       client_body_timeout 60;
       send_timeout 300;
       lingering_timeout 5;
       proxy_connect_timeout 90;
       proxy_send_timeout 300;
       proxy_read_timeout 90s;
       proxy_pass http://backend;
   }

   location / {
       client_max_body_size 50M;
       proxy_set_header Connection "";
       proxy_set_header Host $http_host;
       proxy_set_header X-Real-IP $remote_addr;
       proxy_set_header X-Forwarded-For $proxy_add_x_forwarded_for;
       proxy_set_header X-Forwarded-Proto $scheme;
       proxy_set_header X-Frame-Options SAMEORIGIN;
       proxy_buffers 256 16k;
       proxy_buffer_size 16k;
       proxy_read_timeout 600s;
       proxy_cache mattermost_cache;
       proxy_cache_revalidate on;
       proxy_cache_min_uses 2;
       proxy_cache_use_stale timeout;
       proxy_cache_lock on;
       proxy_http_version 1.1;
       proxy_pass http://backend;
   }
}
Save the file and let’s check that we can restart Nginx:
sudo nginx -t
sudo systemctl restart nginx
Great stuff – You should now be able to access your Mattermost server, over HTTPS (SSL) and any attempt to access it over HTTP will simply redirect the user to HTTPS.
Locking down our server
As you’ve probably twigged, at the moment, users could still access our server using http://{your-domain}:8065 and avoid being redirected to SSL by Nginx.
We will now install and configure a firewall to only allow connections over SSH, HTTP (Port 80 – so Nginx can redirect to HTTPS for us) and HTTPS (Port 443) ensuring that Nginx will handle all web requests, users cannot bypass the proxy and we can still get access to our server via. SSH.
sudo ufw default deny incoming
sudo ufw default allow outgoing
Now add our required rules like so:
sudo ufw allow 22
sudo ufw allow http
sudo ufw allow https
Now enable the firewall like so:
sudo ufw enable
Now check that status of our firewall…
sudo ufw status verbose
It should look as follows:
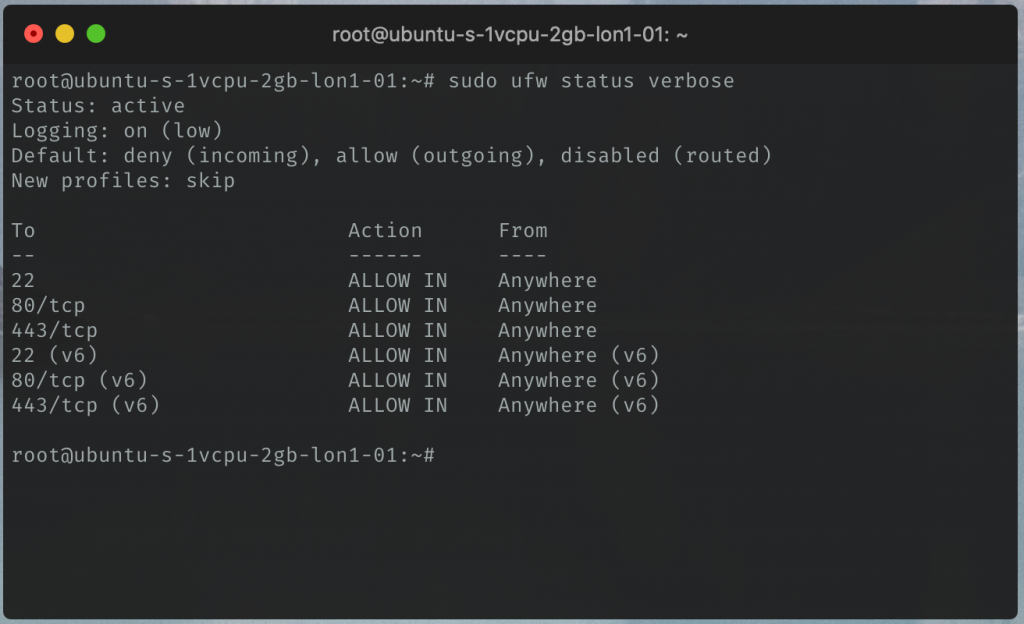
Fantastic, that’s the firewall setup! If you now try to access Mattermost directly now (trying to bypass the proxy) this should now fail.
If you need to remove services in future to the firewall you can do so by using sudo ufw delete allow 80 or sudo ufw delete allow http as required.
Configuring outbound mail
Now that everything is pretty much setup and ready to use, we’ll now access the Admin Console using this address:
https://{your-domain}/admin_console
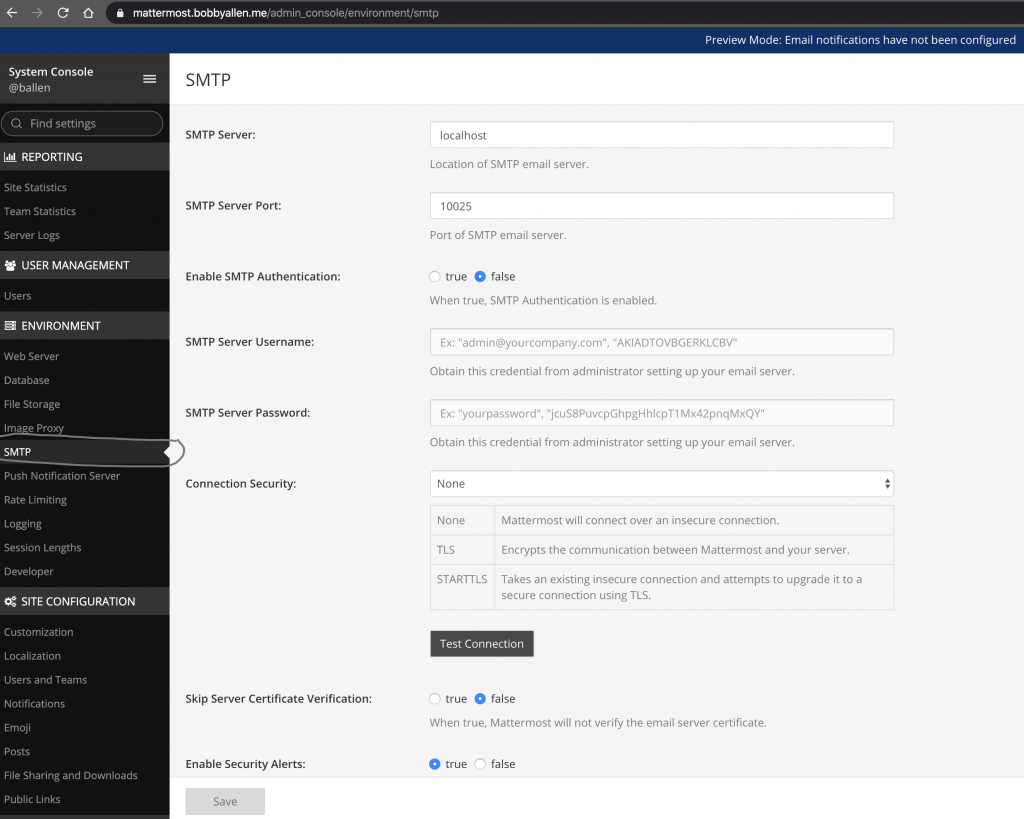
From there we can access the SMTP settings from the SMTP link in the navigation list, you should then configure your SMTP server as required:
That’s all there is to getting your own Mattermost server online.
You can see from the Admin Console, there are a ton of things you can play around with but this is as far as this tutorial is going to go – Have fun!