
At the time of writing PHP 7.0.6 is the latest stable release and given that we are going to be using Microsoft’s IIS as the web server on Windows Server 2012 R2 (x64) we will need to download the latest version of PHP 7.0.x ensuring that we download the NTS (Non-thread safe) version and the x64 build.
To get PHP7 installed on our server will will break down the installation into a number of separate, logical step; these are as follows:-
- Download the PHP binaries
- Download and install the VC14 (Visual C++ 2015) runtime.
- Install the CGI module in IIS
- Configure PHP in IIS
Downloading the PHP binaries
You can download the latest PHP binaries from the PHP website found here: http://windows.php.net/download/.
You must pay special attention to the version that you download, given that my server(s) run the 64-bit version of Windows, I will naturally choose to download and go for the x64 NTS (none-thread safe) version of PHP.
Once downloaded, extract all the files to C:\PHP, this directory will be used to store our PHP binaries and configuration files.
Download and install the Visual C++ 2015 runtime
PHP7 (at the time of writing at-least) has been compiled in Visual Studio 2015 and thus needs the VC 2015 runtime installed on the server, again, it is important that you install the version that matches your servers hardware architecture (x32 or x64) alternatively install both and you cannot therefore go wrong!
You can download the latest VC C++ 2015 runtimes from the Microsoft website here: https://www.microsoft.com/en-gb/download/details.aspx?id=48145
Install the runtime as described above, it is now recommended that you reboot your server for that changes to take full affect!
Installing the CGI Module for IIS
We now need to install the CGI module to enable IIS to “talk” to PHP.
Using explorer, open up the Administrative Tools section in the Control Panel of which can be found at this location: Control Panel\All Control Panel Items\Administrative Tools
Once the Server Manager tool opens, you should see a Add Roles link, click that and now ensure that “CGI” is ticked as per the below screenshot:

Then click Next and Continue to install the CGI module, it is at this point that I would recommend you restart your server (or IIS at the minimum!)
Note: Although this post is for Windows Server 2012 R2, if you have stumbled across it specifically for installing PHP7 on Windows and are using Windows Vista or 7, you can find the CGI feature under: Control Panel\Programs and Features. After opening the Programs and Features icon you should click on the link to the left labeled Turn Windows Features On or Off – In the tree of services that are then displayed, navigate to Internet Information Services\World Wide Web Services\Application Development Features and then tick CGI.
Installing PHP7
Now that we have the required runtimes installed and IIS has the CGI module enabled we can now start the final part of the setup and that is to install PHP!
Using the Administrative Tools found under the Control Panel again, this time we are going to open up the Internet Information Services (IIS) Manager application:
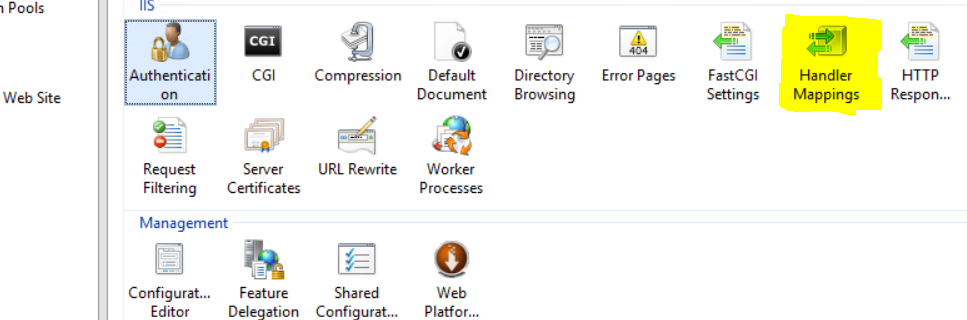
Now, from the left hand menu click on the server’s name and then from the main panel double click the Handler Mappings icon as shown below:
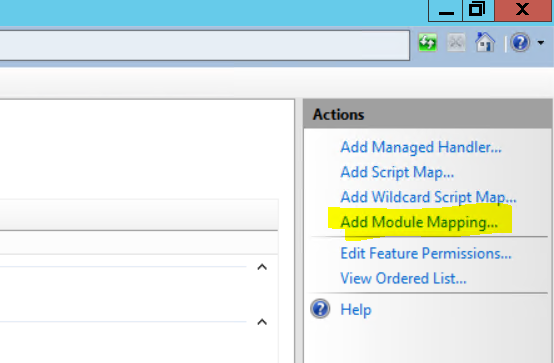
You will now be presented with the current handler mappings supported by the server, on the right hand side of the window you should see a list of Action links, click on the link named Add Module Mapping… as shown here:
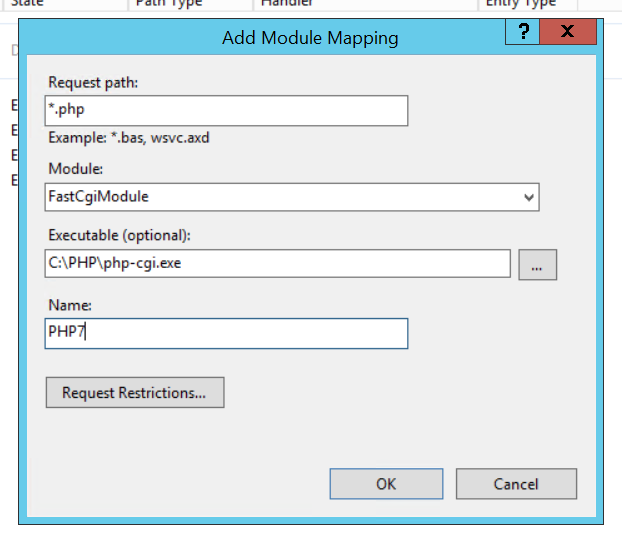
Once the Add Module Mapping window appears, populate the values as follows:
The click on the Request Restrictions button and tick the Invoke handler only if request is mapped to: and then select the File radio button…
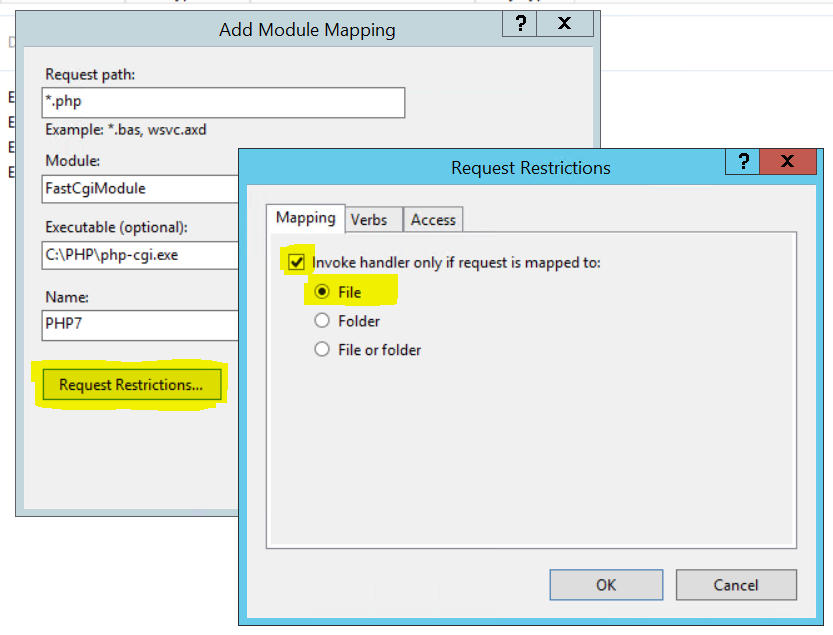
Now click Ok and Ok again, the module mapping is now configured!
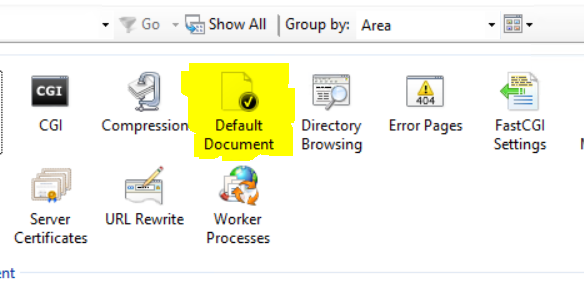
Although not madatory, it is recommended that you now set a default document so that directory level access to pages will automatically serve the “index” page, it is common when serving PHP sites to have “index.php” configured as a the default index page…
To set a new index page, select the server name from the left hand menu and then double-click on the Default Document icon as shown below:
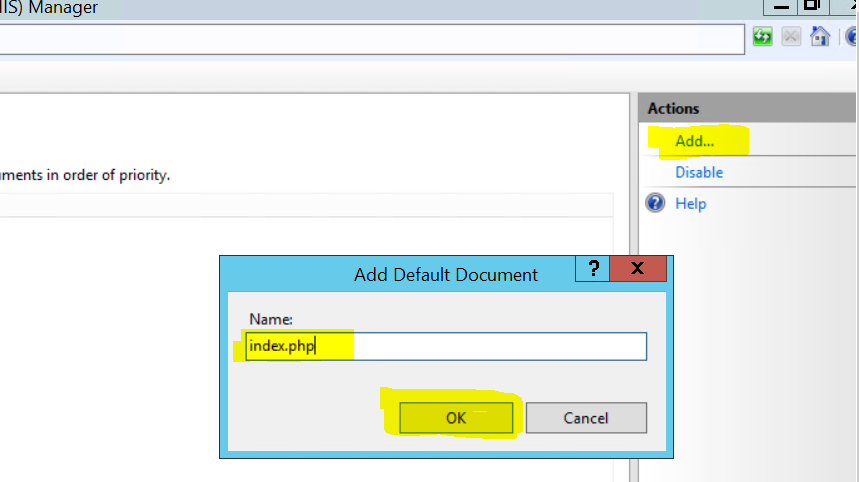
On the right hand menu of the Default Document window you will have the option to Add a new one, click the Add link and then, in the window that pops up type index.php and then click Save as shown here:
Great stuff! – That’s it, adding a new site and add a index.php file into the root of the home directory should now work!
To test it out, create a file named index.php with the following content:
<?php phpinfo(); ?>
Load the file and you should then be able to see all of the PHP runtime configuration and loaded extensions.
At this point we have PHP7 installed in it’s vanilla form, this means that there are no other PHP extensions enabled at present and the timezone etc. has not yet been set.
We will now copy one of the PHP configuration templates to the “working” copy and then make some adjustments, using the Command Prompt run the following command:
copy C:\PHP\php.ini-production C:\PHP\php.ini
Firstly we will set the server’s timezone, so find and uncomment this line and then set your timezone accordingly to this list:
;date.timezone =
As I live in England (GB) and is where my server is located, I will personally choose to use ‘Europe/London’ as my timezone, therefore my line becomes:
date.timezone = Europe/London
Now we will configure the extension directory, so find this section:
; Directory in which the loadable extensions (modules) reside.
; http://php.net/extension-dir
; extension_dir = "./"
; On windows:
; extension_dir = "ext"
…and un-comment (remove the preceding “;” character) the extension_dir = “ext” line so that it now becomes:
; Directory in which the loadable extensions (modules) reside.
; http://php.net/extension-dir
; extension_dir = "./"
; On windows:
extension_dir = "ext"
Finally we will uncomment some CGI “fixes” for IIS, this will improve security and performance, so uncomment the following lines and set them to match the values below:
; cgi.force_redirect is necessary to provide security running PHP as a CGI under
; most web servers. Left undefined, PHP turns this on by default. You can
; turn it off here AT YOUR OWN RISK
; **You CAN safely turn this off for IIS, in fact, you MUST.**
; http://php.net/cgi.force-redirect
cgi.force_redirect = 0

; cgi.fix_pathinfo provides *real* PATH_INFO/PATH_TRANSLATED support for CGI. PHP's
; previous behaviour was to set PATH_TRANSLATED to SCRIPT_FILENAME, and to not grok
; what PATH_INFO is. For more information on PATH_INFO, see the cgi specs. Setting
; this to 1 will cause PHP CGI to fix its paths to conform to the spec. A setting
; of zero causes PHP to behave as before. Default is 1. You should fix your scripts
; to use SCRIPT_FILENAME rather than PATH_TRANSLATED.
; http://php.net/cgi.fix-pathinfo
cgi.fix_pathinfo=0

; FastCGI under IIS (on WINNT based OS) supports the ability to impersonate
; security tokens of the calling client. This allows IIS to define the
; security context that the request runs under. mod_fastcgi under Apache
; does not currently support this feature (03/17/2002)
; Set to 1 if running under IIS. Default is zero.
; http://php.net/fastcgi.impersonate
fastcgi.impersonate = 1
Once you’ve saved the php.ini file you can restart your app pool(s) or simple restart IIS for the changes to take effect…
I hope you found this useful!